 Português
  Inglês
  Espanhol
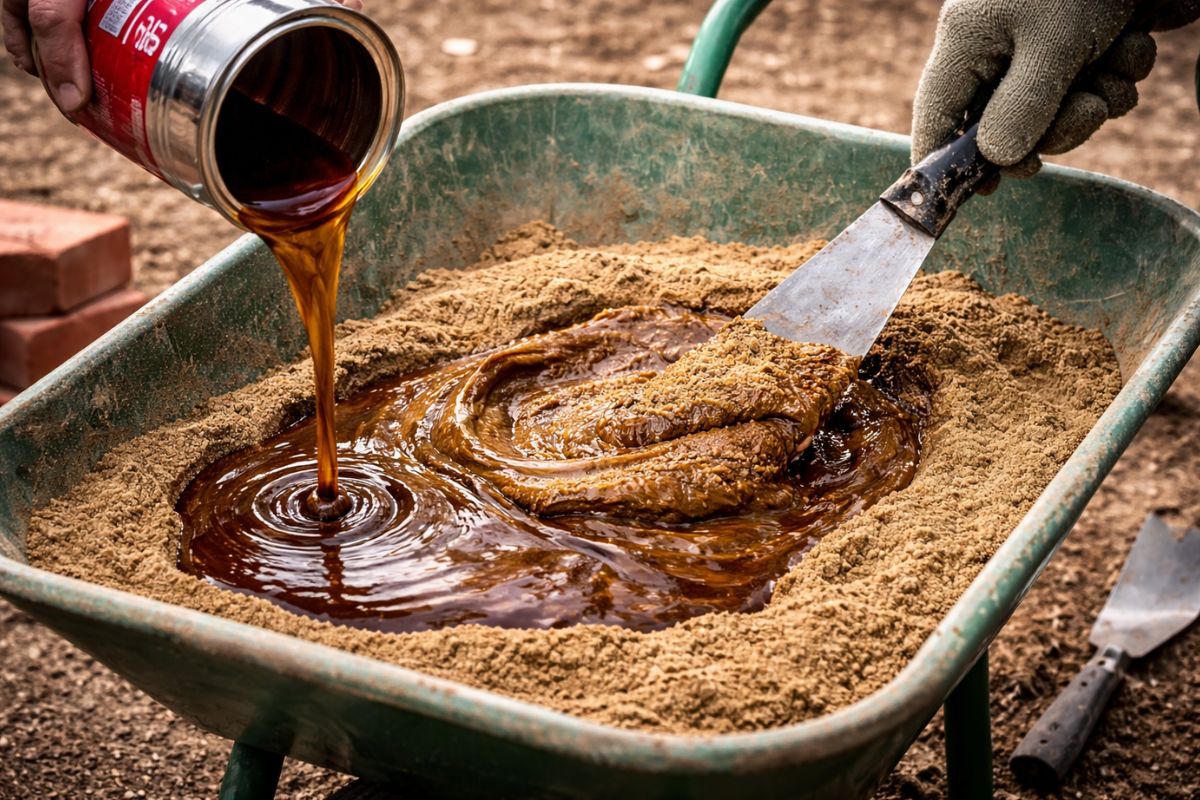
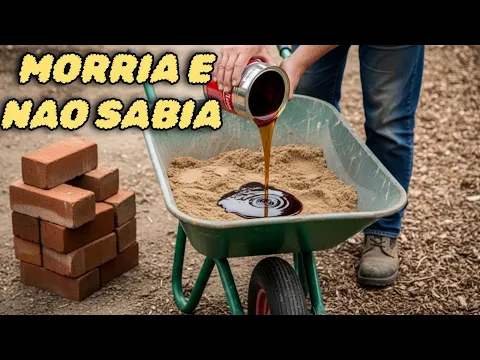
Using Screened Sand with Varnish to Fill Small Cracks Emerges as a Practical Solution in Areas Exposed to Rain, Because the Mix Can Be Made with Few Materials, Applied with a Spatula or Spoon, Dry in About Four Hours, and Form a Layer That Helps to Contain Leaks in Repairs.
Using screened sand with varnish appears as a simple solution for those needing to deal with cracks in slabs, walls, sidewalks, or floors without immediately resorting to a larger intervention. The logic is straightforward: transform two common materials into a repair mix capable of filling the crack, closing the visible space, and creating a layer that is more resistant to water passage.
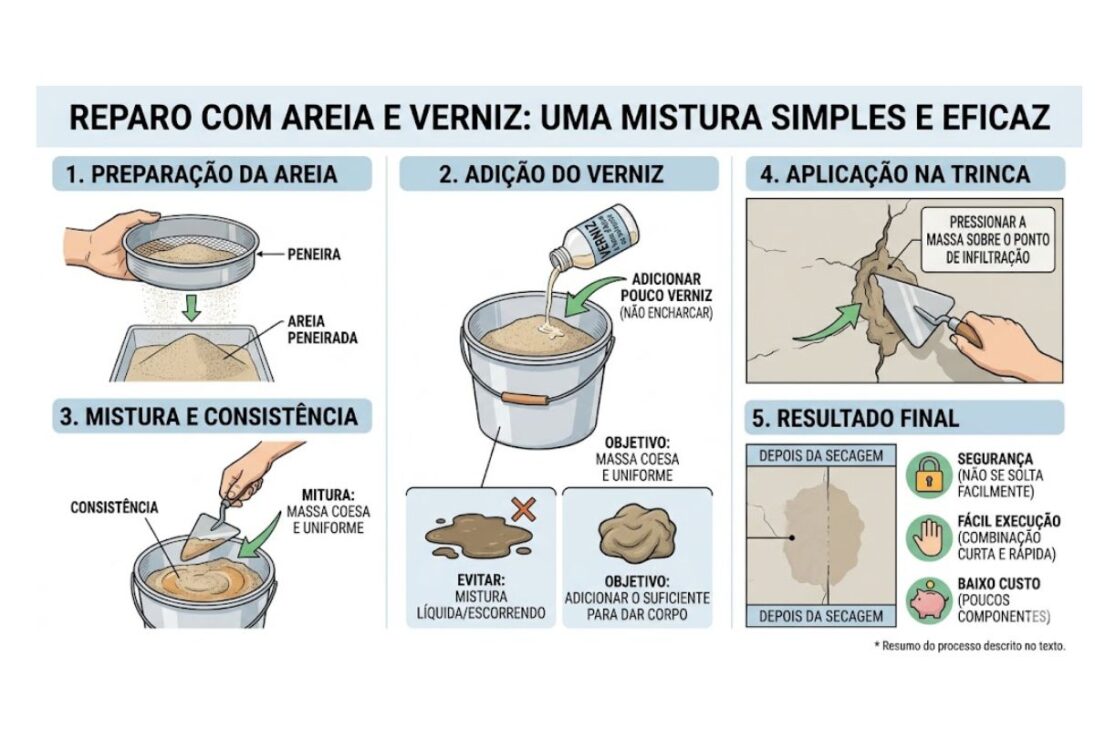
What stands out in this solution is the combination of ease of preparation and versatility of use. Instead of a complex formula, the process depends on screening the sand, adding a little varnish, and mixing until reaching a suitable consistency to spread over the damaged area. After that, the focus shifts to the finishing touches, drying, and protection from leaks that usually start precisely in seemingly small cracks.
Preparation Begins with the Sieve and Defines the Result of the Mixture
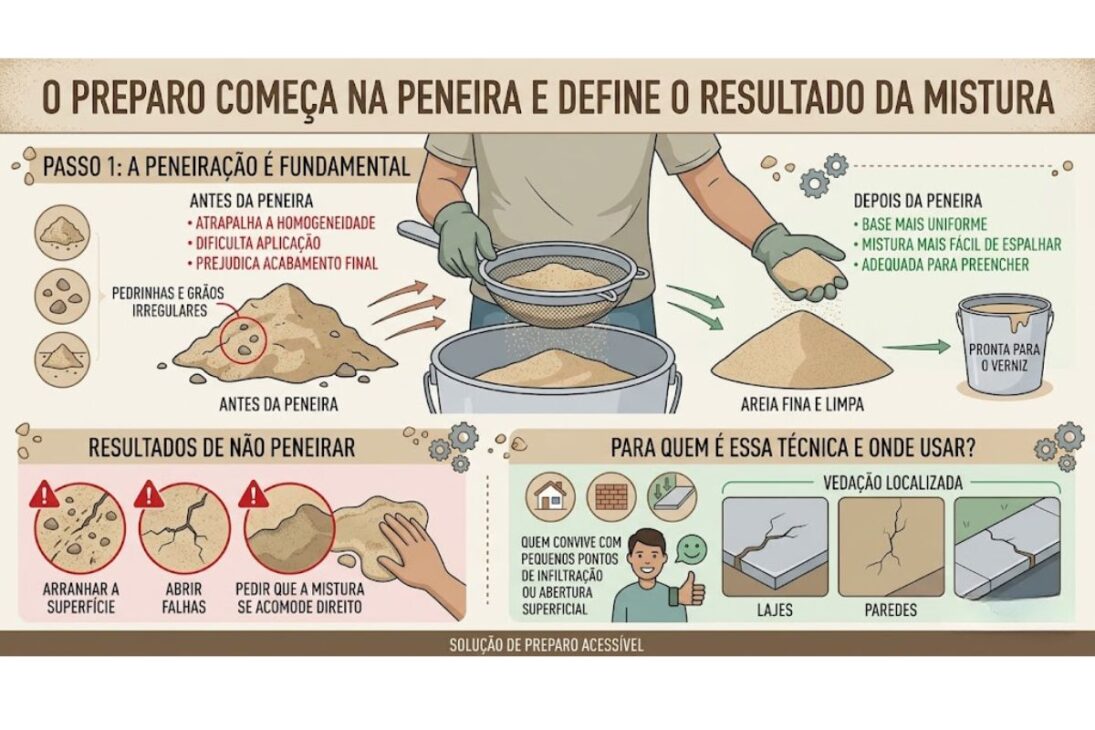
The first step is simple, but it cannot be treated as a detail. The sand needs to be screened before receiving the varnish, because the presence of small stones and irregular grains hinders the homogeneity of the mix and makes both application and finishing more difficult.
-
A megaproject worth R$ 89 billion is advancing in Iraq and promises to change the game in global trade by creating a new corridor between Asia and Europe, reducing traditional routes and repositioning the country as a logistics powerhouse.

-
Goodbye bedside table: floating shelves become a trend in 2026 by freeing up space in the bedroom, improving circulation, bringing visual lightness, and integrating technology without taking up floor space.

-
Israel, Greece, and Cyprus signed an agreement in 2020 to transport gas from the Mediterranean to Europe via a 1,872 km pipeline, but Turkey claimed sovereignty over part of the maritime route, and the project never materialized.

-
Israel, Greece, and Cyprus signed an agreement in 2020 to transport gas from the Mediterranean to Europe via a 1,872 km pipeline, but Turkey claimed sovereignty over part of the maritime route, and the project never materialized.


This care applies to both coarse and fine sand, as the central point is not the initial type of material but rather the elimination of larger particles that can scratch the surface, create gaps, or prevent the mix from settling properly within the crack.
This starting point already answers a practical question for many: those who can resort to this technique are precisely those who face small points of infiltration or superficial openings at home and want an accessible preparation solution.
Sifting transforms the sand into a more uniform base, making the mix easier to spread and more suitable for filling slabs, walls, sidewalks, floors, and other surfaces that require localized sealing.
The Varnish is Added in Small Amounts and Becomes a Simple Application Mix
After the sifting, the varnish is added. The suggestion allows for either water-based or solvent-based varnish, as long as it is mixed directly with the already-prepared sand. The highlighted point is that there is no need to overdo the amount.
The idea is not to soak the sand but to add enough to form a cohesive mix that can be stirred evenly and applied without running too much. The balance between a small amount of varnish and a good mix is what gives body to the repair.
This step also helps explain why the solution sparks interest. Instead of relying on many components, the mix arises from a short, direct combination that can be executed quickly.
When well mixed, the screened sand with varnish gains consistency to be taken to the crack and pressed into the infiltration point. The desired result is a compact layer, with enough adhesion to remain in place after drying without easily coming loose during everyday use.
The Application Follows the Crack and Requires Cleaning Before the Repair
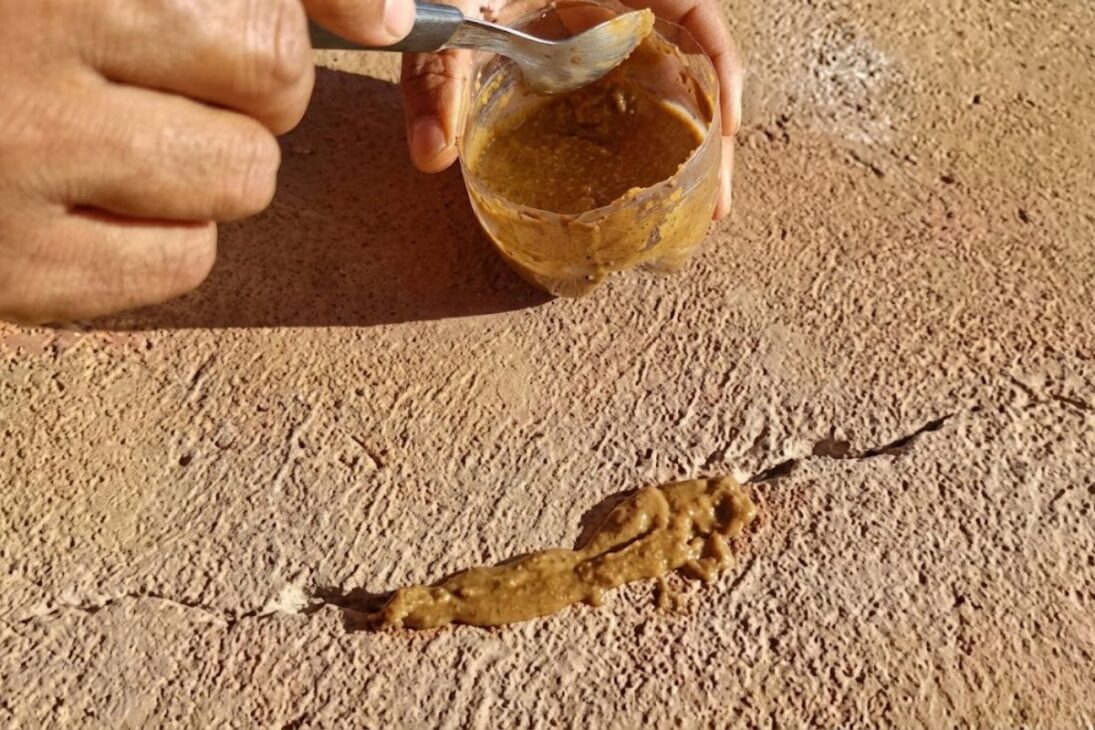
Before spreading the mix, the area needs to be clean. The repair site should be washed or at least sanitized to remove dirt, loose dust, residues, and loose parts that can hinder adhesion. This care applies to slabs with cracks, walls with visible cracks, sidewalks with openings in the surface, and even points of wear on floors. Without cleaning, the mix may visually cover the problem, but it loses efficiency precisely where it matters most: in adhesion.
With the surface ready, the application can be done with a spatula or spoon, pressing the mix into the opening until the space is filled. The movement is not just spreading on top but guiding the mix deep into the crack to seal the path where water usually enters. Next comes the finishing stage, which should leave the surface smoother and level. This care is important because, besides the appearance, better finishing reduces points of water accumulation and helps the layer work more uniformly.
After About Four Hours, the Layer Dries and Changes the Behavior of the Area
One of the most relevant points of the method is the drying time. The reference given is about four hours for the varnish used to dry, which places the solution in a field of relatively quick response for small repairs. This makes a difference especially in areas where infiltration appears right in the first rains, like slabs and exterior walls. In just a few hours, the mix transitions from being just fresh material to functioning as a hardened layer over the crack.
In practical demonstration, the treated surface withstands manual friction without easily detaching and also reacts differently to contact with water. While unprotected areas tend to stain or absorb moisture, the area covered by the mix maintains another behavior, showing less sign of immediate infiltration. This helps to understand why the technique is associated with sealing cracks: it does not only act as visual filling but also as a simple barrier to reduce water passage.
Slabs, Walls, Sidewalks, Garages, and Even Roofs Are Included in the Scope of Use
The application is not limited to a single spot in the house. The proposal extends to slabs, sidewalks, floors, walls, garages, and even roofs, always focusing on cracks, fissures, and small points of water entry. In the case of roofs, the guidance shown is to support from the inside with masking tape and pour the mix over the top, allowing the material to settle into the hole and form a seal in the affected area. This expands the reach of the technique and explains why it generates so much curiosity among those dealing with home maintenance.
This variety of use also helps to answer where the mix makes the most sense: on surfaces exposed to the weather, rain, and daily wear, especially when the problem is still concentrated in localized points. Instead of a generic application for any situation, the method gains strength precisely in targeted repairs, where quick sealing and firm finishing can prevent a small crack from evolving into a more bothersome infiltration inside the house.
The Low Cost of Varnish Reinforces the Appeal of the Solution
Another aspect that weighs in favor of the technique is cost. Water-based varnish appears as a cheap option, with references for 1 liter ranging between R$ 30 and R$ 45, while another water-based varnish is cited around R$ 60.
The message is clear: with a little product, it is already possible to do a lot, because the mix does not require a large volume of varnish to reach the desired point. This detail brings the solution closer to the reality of those who need to solve a domestic problem without spending much.
This economic factor also helps explain why the mix attracts attention in households where infiltration starts with a small but persistent sign. When water passes through a crack, damage rarely stays in the same place: stains, leaks, discomfort, and the need for makeshift solutions to contain water entry arise. In this scenario, the screened sand with varnish gains space as a quick, cheap, and easy-to-prepare response, especially for those who want to act before the crack advances.
What Makes the Technique Attractive Is the Sum of Simplicity, Drying, and Sealing
The method does not rely on complicated promises or a difficult sequence to execute. It is sustained by repeating simple steps: sift, mix, clean, apply, smooth, and wait to dry. This reduces the entry barrier for those who have never done this type of repair and need a comprehensible solution, without excess steps or reliance on many materials. The strength of the technique lies precisely in this operational simplicity.
At the same time, the appeal comes not only from the ease. What really sustains interest is the practical effect: the mix covers the crack, hardens after drying, and creates a layer that makes infiltration difficult. When this combination works, the repair ceases to be merely aesthetic and begins to hold functional value in the daily life of the home. It is this junction of simple execution and concrete utility that makes screened sand with varnish stand out as a point maintenance alternative.
In the end, the technique gains strength because it addresses a common problem with a direct, cheap, and easy-to-reproduce solution on different surfaces of the house.
When the crack is still localized and the infiltration starts to show the first signs, acting quickly can prevent bigger headaches later. And in your case: would you dare to test this mix on a slab, wall, sidewalk, or roof? Let us know in the comments where this type of crack bothers you most in your home and if you would bet on this solution or not.


-

-

-

-

-

17 pessoas reagiram a isso.