 Portuguese
  English
  Spanish
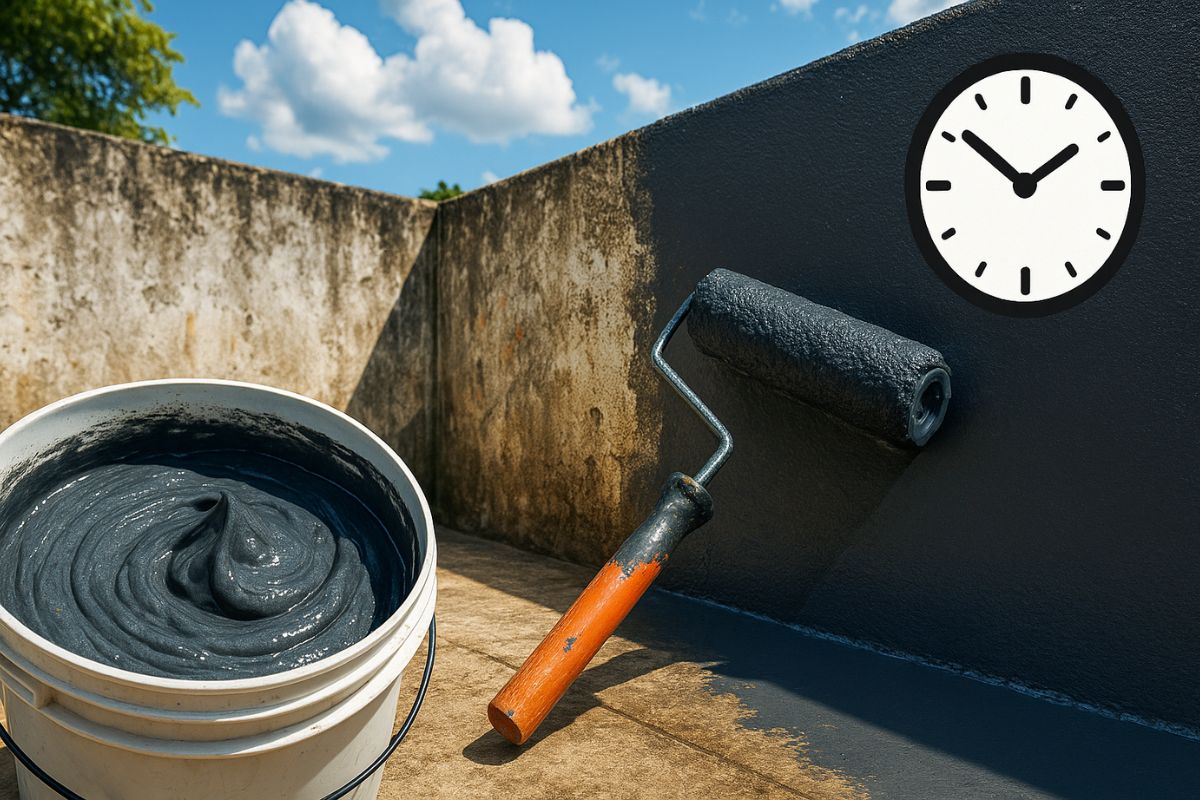


Powerful Homemade Paint With Cement And Varnish Promises To Renew Old Concrete With High Adhesion And Quick Coverage
Mixing cement with varnish creates a powerful homemade paint capable of covering stains with the first coat, drying in about 8 hours and forming a durable finish on old concrete floors. Using common materials, the mixture creates a layer that penetrates the pores, adheres firmly, and reduces the chance of early peeling.
In practice, this powerful homemade paint combines basic construction principles with simple preparation techniques to transform worn sidewalks and stained slabs into more uniform and protected surfaces. The secret lies in the proportions, the order of mixing, and the application method, which allow for the creation of an economical coating that is easy to use and performs better than one would expect from a homemade solution.
How The Powerful Homemade Paint Of Cement And Varnish Is Born

The base of this powerful homemade paint is the varnish, which acts as a binder and is responsible for the final film.
-
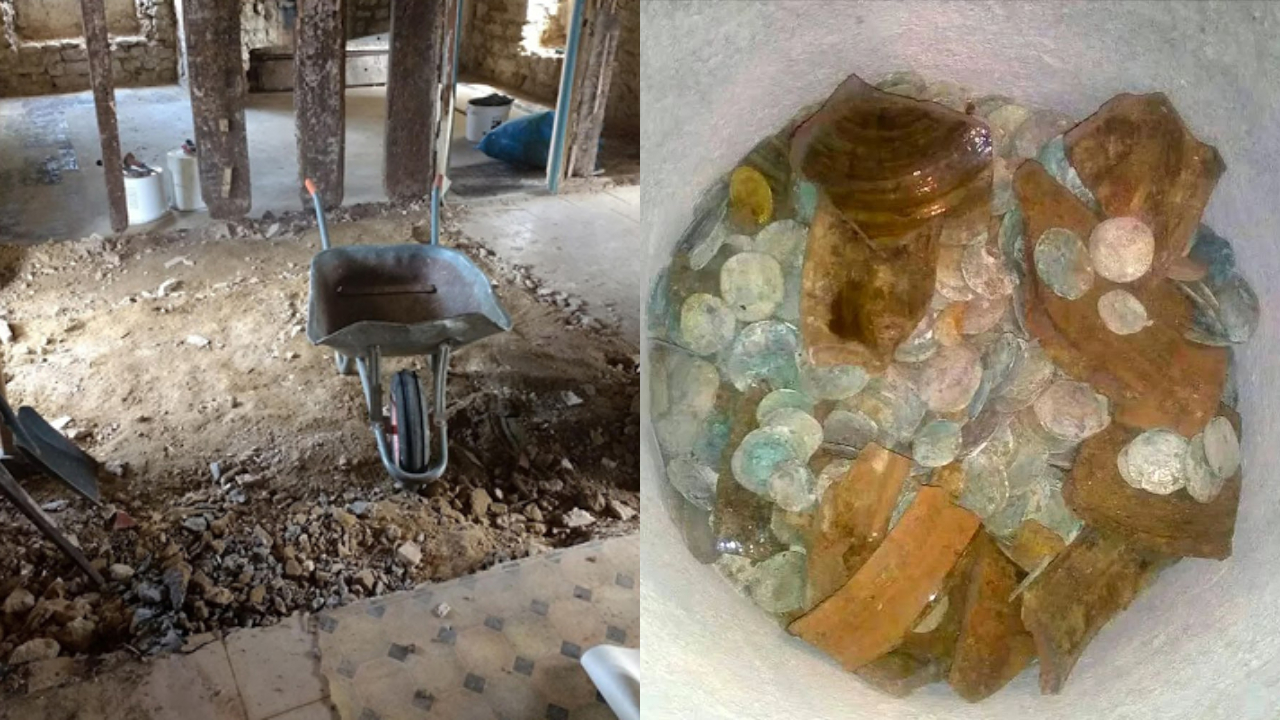
A couple buys an old chalet, breaks the kitchen floor for renovation, and finds over a thousand coins of gold and silver hidden since the English Civil War over 4 centuries ago.
-
Rigid bags with their days numbered: new trend prioritizes comfort in 2026.

-
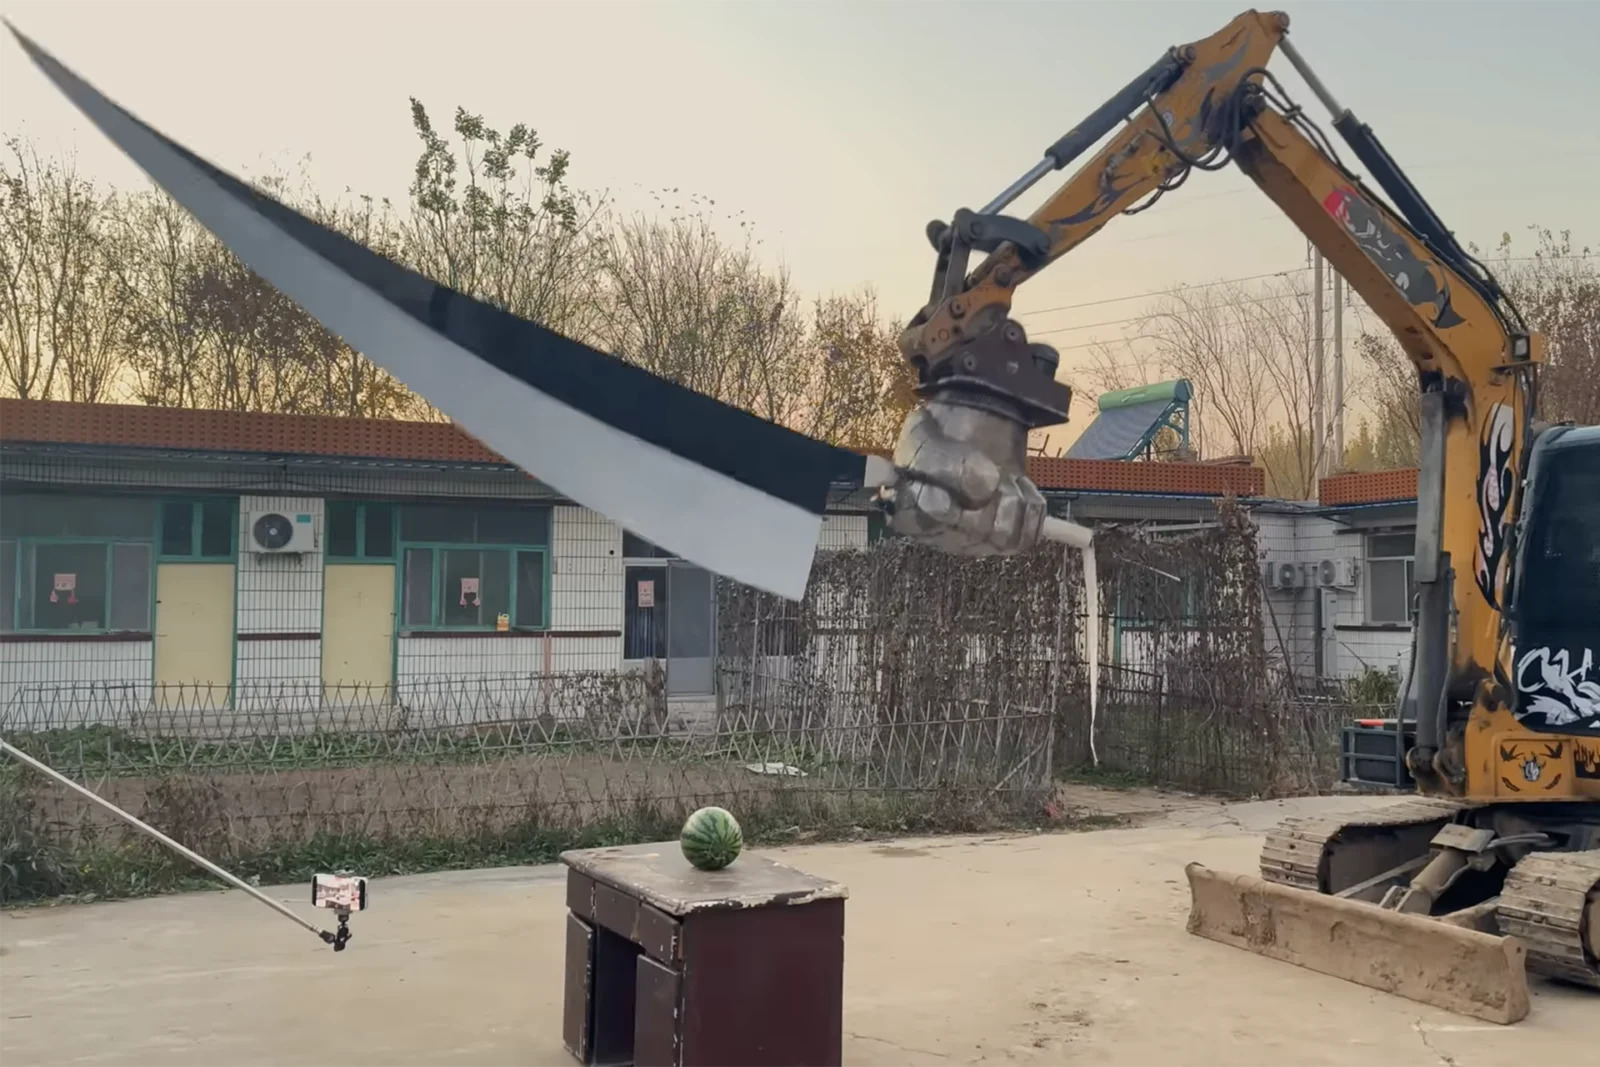
YouTuber creates an excavator equipped with a giant 4.5-meter sword to challenge his brother to a rematch, and the invention quickly goes viral on social media.
-
The U.S. Army surprises the world by presenting the UH-60MX Black Hawk helicopter capable of flying without pilots, controlled by a tablet, featuring the MATRIX system, smart sensors, and full autonomy in real combat and rescue missions.


In a clean container, approximately 250 ml of varnish is placed, measured carefully to maintain the correct proportion.
On top of this liquid base, cement is added, in three full tablespoons, using common cement or structural white cement when a lighter finish is desired.
When incorporated into the varnish, the cement begins to thicken the mixture and brings typical characteristics of concrete, such as pore filling and increased surface resistance.
The next step adds white PVA glue, around 150 ml, which makes the powerful homemade paint more elastic and viscous, reducing the risk of fine cracks and improving adhesion to the old concrete floor.
Proportions, Mixing, and Ideal Point of The Formula
Homogenization is one of the critical points for the powerful homemade paint to function as expected.
In the beginning, the recommendation is to stir slowly with a stick or wooden spatula, just to prevent the cement powder from rising too much.
Once the material begins to incorporate, it is possible to speed up the motion so that the mixture thickens and becomes uniform.
For those looking for an even more professional finish, the base itself shows a trick: using an improvised mixer with a wooden rod and plastic clamps attached to a drill.
This solution allows for mixing varnish, cement, PVA glue, and then the pigment much more efficiently, removing lumps and air bubbles.
The result is a powerful homemade paint with a fluid, homogeneous texture ready to be applied without visual flaws.
Pigmentation And Choosing The Color Of The Powerful Homemade Paint
The color of this powerful homemade paint comes from powdered pigments added directly to the mixture.
In the reference step-by-step, about 20 grams of red pigment were used to create a more intense and striking effect, but the technique allows for other shades, such as blue, green, yellow, or combinations between them to generate exclusive colors.
The care here lies in the dispersion of the pigment.
It is necessary to mix for a few minutes until the powder is completely incorporated, with no lighter points or accumulations at the bottom of the container.
When well pigmented, the powerful homemade paint delivers a visually uniform finish, without stains, and reinforces the feeling of renewal on worn sidewalks and concrete floors.
Application Of The Powerful Homemade Paint On Old Concrete
The most didactic test of this powerful homemade paint was done on an old concrete sidewalk, with stains, wear, and a completely faded appearance.
One of the system’s differentials is the simplicity of use.
There is no need for a preliminary sealer on the floor, as long as the surface is clean and free of loose debris.
The application is done with a paint roller, loading the accessory well and spreading the mixture directly onto the concrete. Even with the first coat, the visual effect is evident.
The coverage is uniform, the stains disappear, and the texture spreads easily.
The key point is that the paint penetrates the pores of the concrete, generating a firm and continuous adhesion, rather than forming just a fragile superficial film.
Drying Time, Resistance, And Durability Of The Finish
After application, the powerful homemade paint needs a minimum drying time of about 8 hours.
During this interval, the mixture is absorbed by the concrete, the cement reacts, the varnish forms the protective film, and the PVA glue helps to stabilize the film.
Once this period has passed, the finish becomes more resistant, with good surface hardness and the feel of a renewed surface.
According to the tests described in the actual experience of use, the result is a floor with a beautiful appearance, durable and practically waterproof for everyday use.
The finish does not peel easily and withstands cleaning with water and soap without losing color, shine, or integrity, as long as the preparation and application have been done correctly.
For those dealing with stained sidewalks or aged slabs, this combination of performance and low cost makes the solution especially interesting.
Care, Limits, And Best Practices With The Powerful Homemade Paint
Even being a powerful homemade paint, it is a product with varnish, cement, and pigments, which requires some basic precautions.
It is important to work in a ventilated area, clean the floor well before application, and avoid loose, greasy, or overly powdery surfaces.
The better the preparation, the more uniform the result tends to be.
Another point is to respect the proportions shown in the original recipe.
Exaggerating the amount of cement or glue can alter the viscosity too much and compromise the anchoring in the concrete.
Using the powerful homemade paint exactly as formulated helps to maintain the balance between penetration, elasticity, and resistance, which is the differential of this homemade mixture compared to improvised solutions without criteria.
Other Experiences With Homemade Paint And Metal Surfaces
Although the main focus is on the powerful homemade paint for concrete, the same logic of combining common materials appears in another experience described in the base: the mixture of liquid silicone glue with ethanol and metallic pigments.
In this variation, the goal is to create a glossy finish paint for metal and glass, with good adhesion even on smooth surfaces.
The principle is similar. The silicone glue provides the film, ethanol adjusts the viscosity for easier application, and the metallic pigment delivers the visual effect.
Applied on rusty iron and glass, the mixture forms a uniform and resistant layer, showing how different combinations can generate interesting alternatives for homemade coatings, as long as proportions and drying times are respected.
In the end, all these experiences point in the same direction.
When the mixture is well thought out, a powerful homemade paint can revitalize worn surfaces and extend the use of materials that already exist at home, without relying exclusively on ready-made products from shelves.
HOMEMADE VARNISH + CEMENT + PVA GLUE PAINT
Ingredients And Proportions
1) Varnish
• 250 ml
2) Cement
• 3 tablespoons heaping
• Can be common cement or structural white cement
3) White PVA Glue
• 150 ml
4) Powdered Pigment
• 20 g (any color)
Preparation Method (Technical Summary)
• First, mix the varnish with the cement
• Stir until thickened
• Add PVA glue
• Mix again until homogeneous
• Add the pigment and stir until completely dissolved
Application On Concrete
• Drying Time: 8 Hours
• 1 coat covers well, but 2 can be applied
• No sealer needed
HOMEMADE METALLIC PAINT (SILICONE GLUE + ETHANOL)
Ingredients And Proportions
1) Liquid Silicone Glue
• 100 ml
2) Ethanol
• 50 ml
3) Metallic Pigment
• 2 g per color (text mentions silver and bronze)
Preparation Method (Technical Summary)
• Mix the glue with the ethanol until homogeneous
• Divide the mixture into two equal parts (optional)
• Place 2 g of pigment in each pot
• Mix for 3 to 5 minutes until well dissolved
Application On Metal And Glass
• 1st coat: dries to the touch in 15 Min
• Apply 2 to 3 coats
• Final Drying: 6 Hours
For you, would it make sense to test this powerful homemade paint on any floor or concrete area in your home, or do you prefer to stick to traditional factory paints?


Pode aplicar em telha de fibrocimento ?
Quero fazer 18 mlts qual seria a proporção e se leva água pra render
Quantos litros de água?