 Portuguese
  English
  Spanish
See How to Prepare the Wall, Apply Three Coats of Burnt Cement, and Use Sanding or Polishing to Adjust Shine, Texture, and Leveling, Ensuring a Modern, Durable Finish with a Deep Visual Effect in Indoor Environments
The burnt cement has regained space in indoor environments because it combines a modern appearance with a more industrial style. This look attracts those seeking practicality, so it is common to find the finish in living rooms, kitchens, and even facades. Before starting the application, it is important to closely examine the surface.
The wall needs to be firm and free of residues. Dust, grease, soap, or mold hinder the product’s adhesion and can cause future failures.
If there are loose parts, remove everything with a brush or scraper. Poorly prepared surfaces create unwanted stains.
-
From sertanejo star to international investor: Ana Castela invests millions in a mansion in the USA, creates a themed accommodation in Orlando, and shows that the “boiadeira” also wants to grow away from the stage.

-
The 10 most stunning motorhomes in the world: a $3 million trailer with a rooftop nightclub and garage for a Ferrari, “palaces on wheels” with Italian marble, private cinema, and five-star hotel luxury for billionaires.

-
Trump wanted to spend $400 million on the White House, but the courts prohibited the million-dollar construction.

-
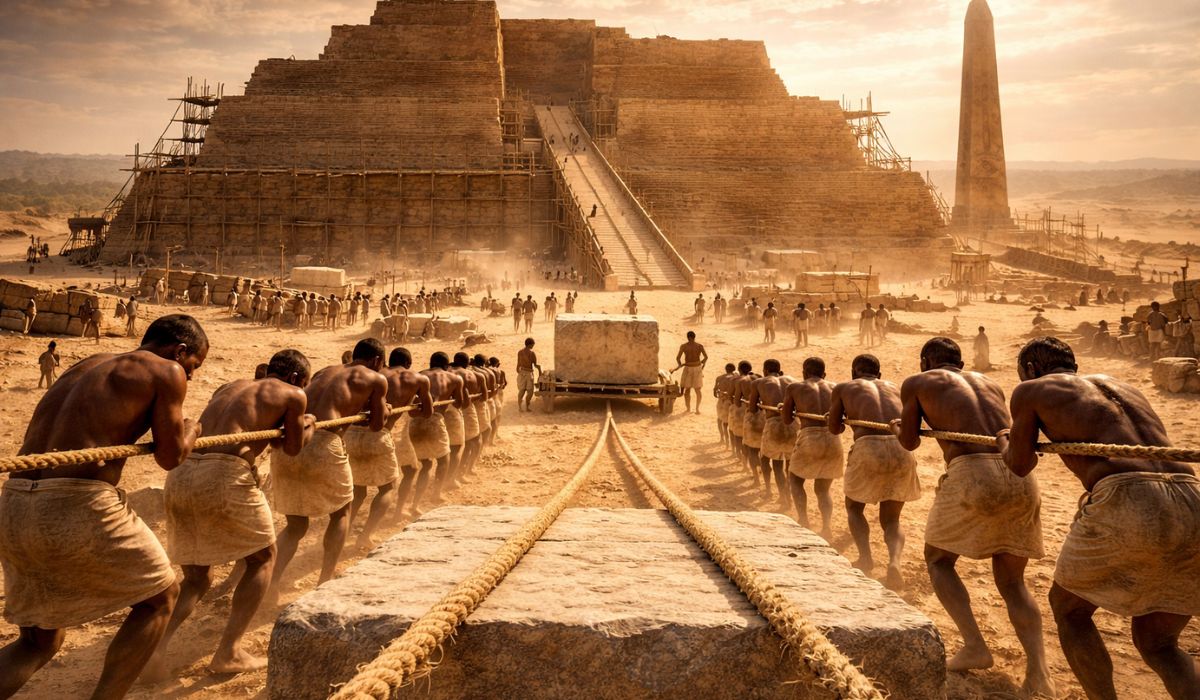
How the Egyptians erected giant structures like pyramids, temples, and obelisks without modern technology, cranes, or engines still amazes the world and reveals the power of engineering based on ramps, levers, ropes, and colossal organization.

Additionally, each manufacturer provides specific guidelines. Check the packaging to understand the recommended care for the type of base you have.
First Coat
The first coat creates the base for the final effect. Use a rounded steel trowel, as it facilitates spreading. Place a small amount of the product and distribute it with firm movements.
This initial layer needs at least four hours to dry. It is essential for the final result.
Second Coat
When the wall is dry, apply the second coat. The difference lies in the direction of the movements. Use opposite directions to those of the previous application to create the typical nuances of burnt cement.
This contrast defines the aesthetics of the finish. The layer also reinforces the coverage.
Third Coat on the Wall
The third coat finalizes the process and makes the texture more uniform. Repeat the movements from the previous steps carefully.
This stage ensures a well-defined appearance and a visual sense of depth, common in projects that use this material. It is a quick phase, but it should not be rushed.
Optional Shine and Leveling
Those seeking a smoother surface can sand between applications. This procedure removes small imperfections and improves texture. The wall feels smoother to the touch.
To enhance the shine, press the trowel against the already dry coating. This friction creates a light or more intense shine, depending on the pressure used.
Furthermore, this finish gives a more sophisticated appearance without straying from the industrial style.
By following this step-by-step guide, the effect gains durability and maintains the aesthetics that many people seek.
With information from Quartzolit.


-

-

3 pessoas reagiram a isso.