 Portuguese
  English
  Spanish
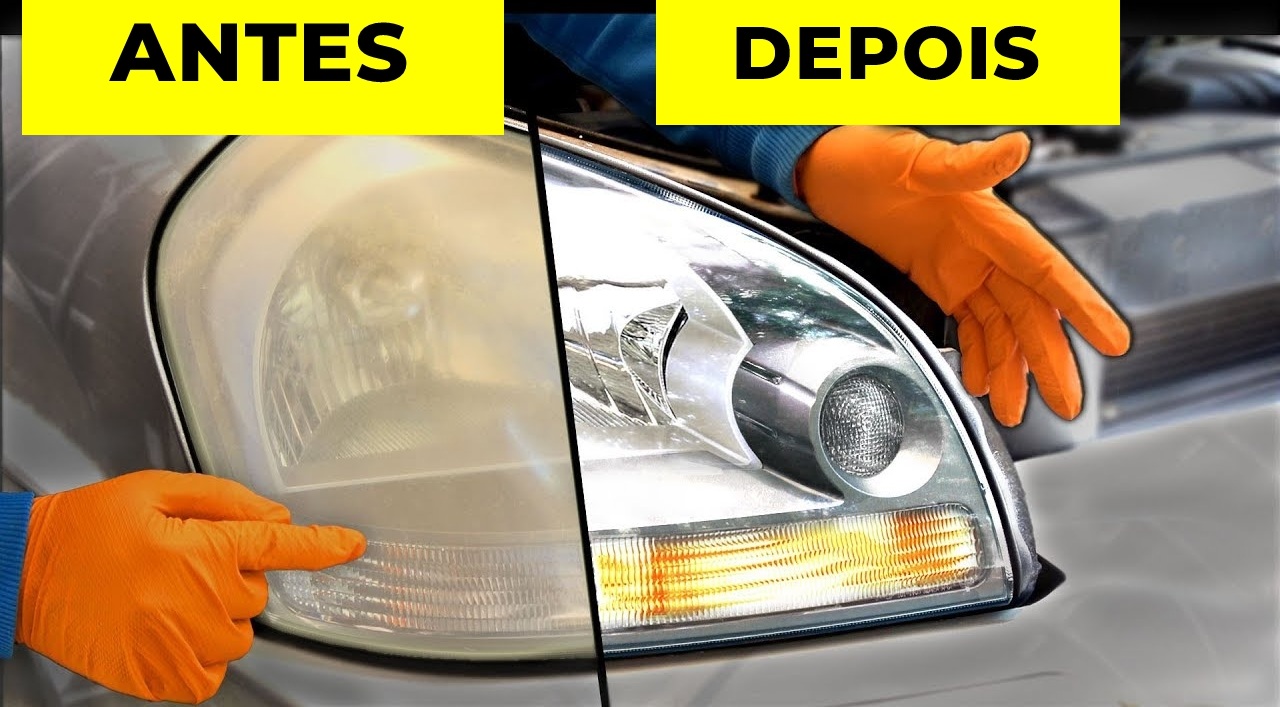
Learn To Clean Your Car’s Headlights In Four Simple And Practical Steps, Restoring Clarity And Ensuring A Safer And More Efficient Drive.
Foggy headlights can detract from the car’s appearance and reduce nighttime visibility, posing a safety risk. This problem is common, as most modern headlights are made of polycarbonate plastic.
This material, although durable, degrades over time due to sun exposure. The result is cloudy and yellowed lenses.
The good news is that you can restore your car’s headlights without paying for professional services. With simple items you likely have at home, like toothpaste, baking soda, and lemon juice, you can clean and protect the headlights. Below, check out a practical four-step guide to effectively solve the problem.
-
Fiat launches the new 2027 Toro hybrid with 48V, 176 hp, an electric motor of 15.5 hp, a 0.85 kWh battery, up to 7% fuel savings, 8% fewer emissions, and possible exemption from IPVA.

-
Used automatic cars from Hyundai that are reliable, offer comfort, good performance, and cost between R$ 45,000 and R$ 75,000.

-
Electric car surprises on the Transamazon Highway as it tackles a mud pit; Saveiro and Hilux get stuck and need to be pulled out, while a milk truck crosses alongside with ease and draws attention.

-
The war in Iran could be the push needed for the electric vehicle market to truly explode because when the price of oil exceeds 100 dollars a barrel, combustion cars become a luxury, and China already dominates 60% of the global electric market.


Step 1: Gather Your Supplies
Before you begin, make sure you have all the necessary materials. You will need:
- Baking soda
- Toothpaste (the white kind, not gel)
- A spray bottle
- Water
- A soft cloth
- Car wax
Some optional items may also help, such as lemon juice and insect repellent. Surprisingly, these everyday products can be effective in removing the cloudy layer that forms on polycarbonate plastic.
Having all these materials on hand makes the process easier and ensures a satisfactory result.
Step 2: Clean The Surface
The next step is to wash the headlight lenses. Use water and mild soap to remove dirt and accumulated dust. This is important because it prevents unwanted particles from scratching the surface during deeper cleaning.
After washing, use the spray bottle to rinse off the soapy water and dry the area well with a clean cloth. This initial preparation is essential to ensure that the following steps yield an effective and safe result.
Step 3: Scrub With Your Chosen Solution
Now that the headlights are clean, it’s time to remove the cloudiness. There are several ways to do this. See which method fits best into your routine.
Toothpaste: White toothpaste contains mild abrasives that help polish the headlight surface. Apply a small amount to a soft cloth or to your fingertips. Scrub in circular motions for a few minutes. This will help break down the yellowing caused by UV exposure. Then, rinse and dry with a clean cloth.
Baking soda and water: If the toothpaste doesn’t fully resolve the issue, make a paste of baking soda and water. Apply this mixture to the headlights and scrub in circular motions with a soft cloth. Baking soda also has light abrasive properties, ideal for restoring lens clarity. Afterward, rinse and dry.
Lemon juice and baking soda: For those who prefer a natural approach, mix lemon juice with baking soda until you obtain a thick paste. Apply the mixture to the headlight and let it sit for a few minutes. The lemon juice, being acidic, enhances the abrasive effect of the baking soda. Scrub, rinse, and dry to complete the process.
Insect repellent: Although less conventional, insect repellent can provide temporary help. Spray a small amount onto a soft cloth and rub the headlights in circular motions. The chemicals in the repellent help dissolve the cloudy layer. However, this method should be used with caution, as it can damage the plastic if not controlled properly.
Step 4: Apply A Protective Layer
After restoring the clarity of the headlights, it’s essential to protect them. Applying car wax creates a barrier against UV exposure, helping to prevent cloudiness. Simply apply a thin layer with a soft cloth and polish in circular motions.
In addition to wax, there are specific clear coatings for headlights that also offer prolonged protection. This step is vital for keeping the lenses in good condition for a longer time.
Keep Regular Headlight Cleaning
The headlights will remain clean and clear, but regular maintenance is key to ensuring long-lasting results. Wash the lenses periodically with water and mild soap. Reapply toothpaste or baking soda as necessary.
Ongoing maintenance improves the car’s aesthetics and prolongs the lifespan of the plastic lenses. Taking care of this part of the vehicle not only avoids an aged appearance but also ensures safer driving at night.
By following these four simple steps, you will ensure that your car’s headlights remain clear and functional. This improves visibility, safety, and the overall appearance of the vehicle, without the need for expensive repairs.
With info from howstuffworks.


Seja o primeiro a reagir!