 Portuguese
  English
  Spanish
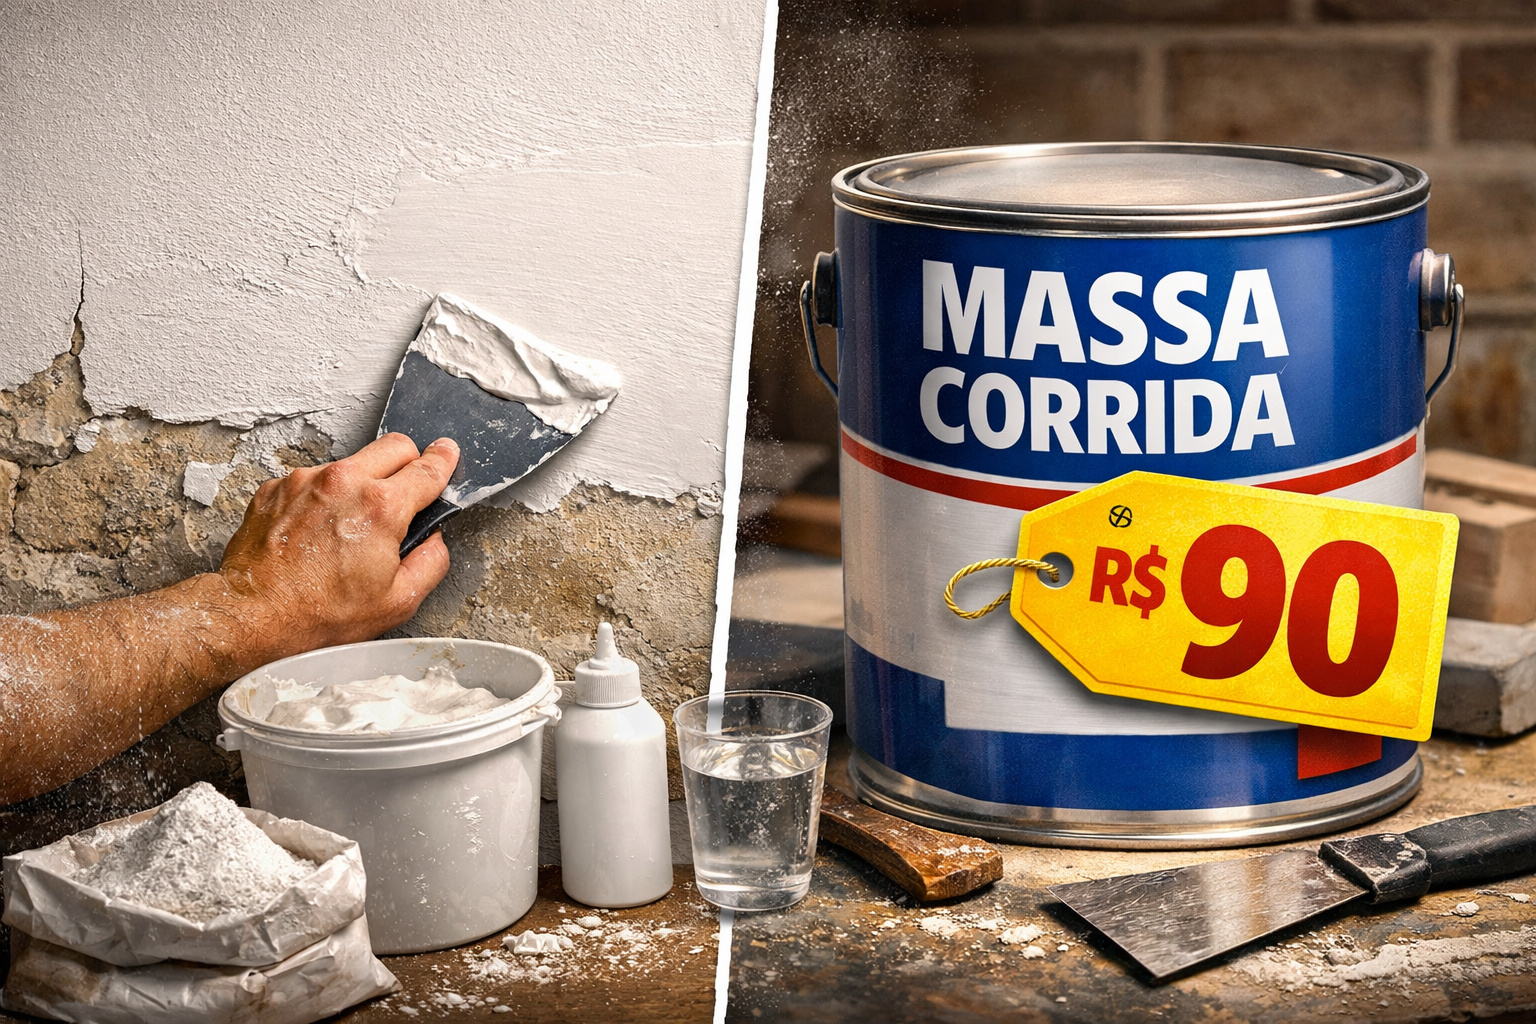
Homemade Leveling Compound Made With Plaster Powder, White Glue, and Water Can Level Internal Walls and Reduce Preparation Costs for Painting by Up to 80% Compared to Industrialized Finishing Plaster.
Homemade Leveling Compound: Plaster and Glue Mixture Can Replace Finished Plaster on Dry Internal Walls: Before Any Painting on Internal Walls, the Surface Needs to Be Completely Smooth and Uniform. New Plaster is Usually Porous, Irregular, and Full of Small Imperfections, Such as Waves, Trowel Marks, Nail Holes, or Joints Between Blocks. To Correct These Problems, Painters Use a Product Called Finished Plaster, Responsible for Creating a Thin Layer That Closes the Pores of the Plaster, Levels the Surface, and Prepares the Wall for Painting. Without This Preparation Step, the Paint Tends to Be Absorbed Unevenly. The Result Is a Stained Wall, with Color Differences and Excessive Paint Consumption in Some Areas. For This Reason, Painting Professionals Claim That The Leveling of the Wall Represents a Large Part of the Final Quality of the Finish, Often Responsible for More Than Half of the Visual Appearance of a Paint Job.
However, the Cost of the Material Can Heavily Impact the Budget of a Renovation. A Can of PVA Finished Plaster of 25 kg, Produced by Popular Market Brands Such as Suvinil, Coral, or Eucatex, Usually Costs Between R$ 55 and R$ 110 Depending on the Region and Supplier. In a Room of Approximately 30 m² of Wall Area, Normally Two Coats Are Needed to Achieve a Proper Finish. This Means That Only the Leveling Material Can Cost Between R$ 80 and R$ 150 Even Before the Purchase of Paint.
This Is Exactly When Many Masons and Painters Turn to an Alternative Known in Construction and Residential Renovations: The So-Called Homemade Leveling Compound.
-
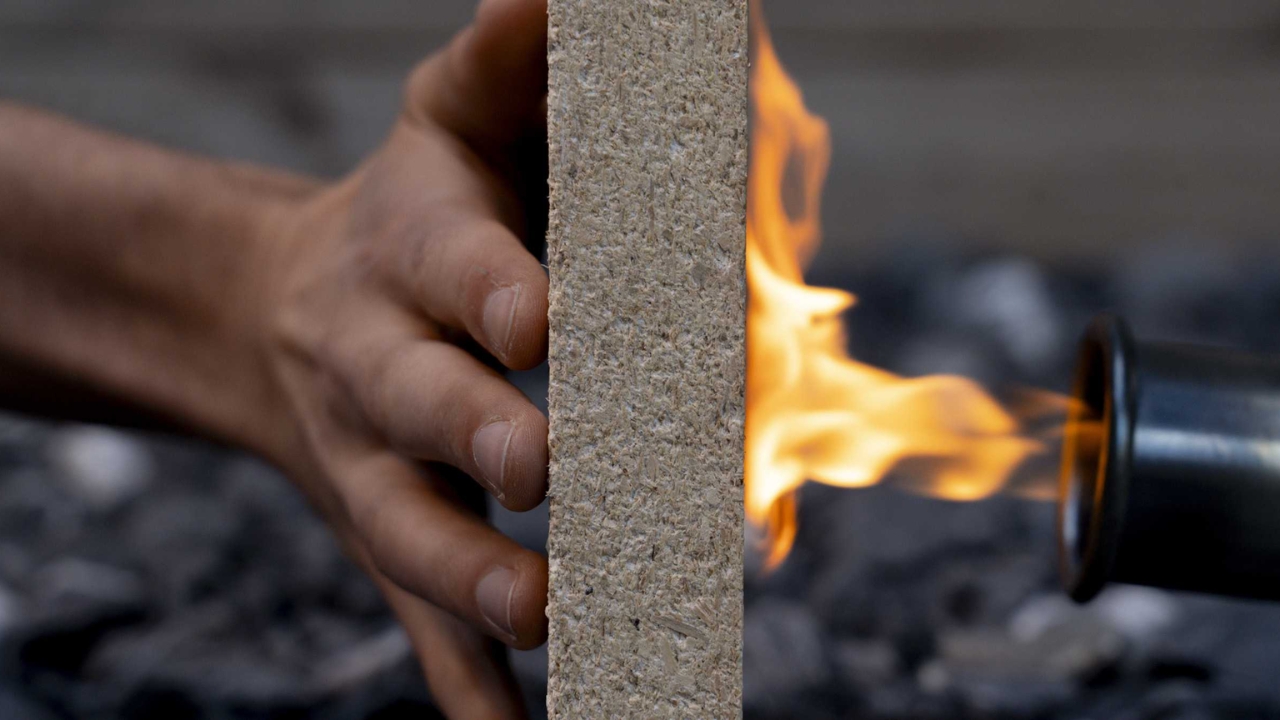
Scientists transform sawdust into fire-resistant panels, stabilize the compound with an enzyme extracted from watermelon seeds, and turn waste into promising material for construction.
-
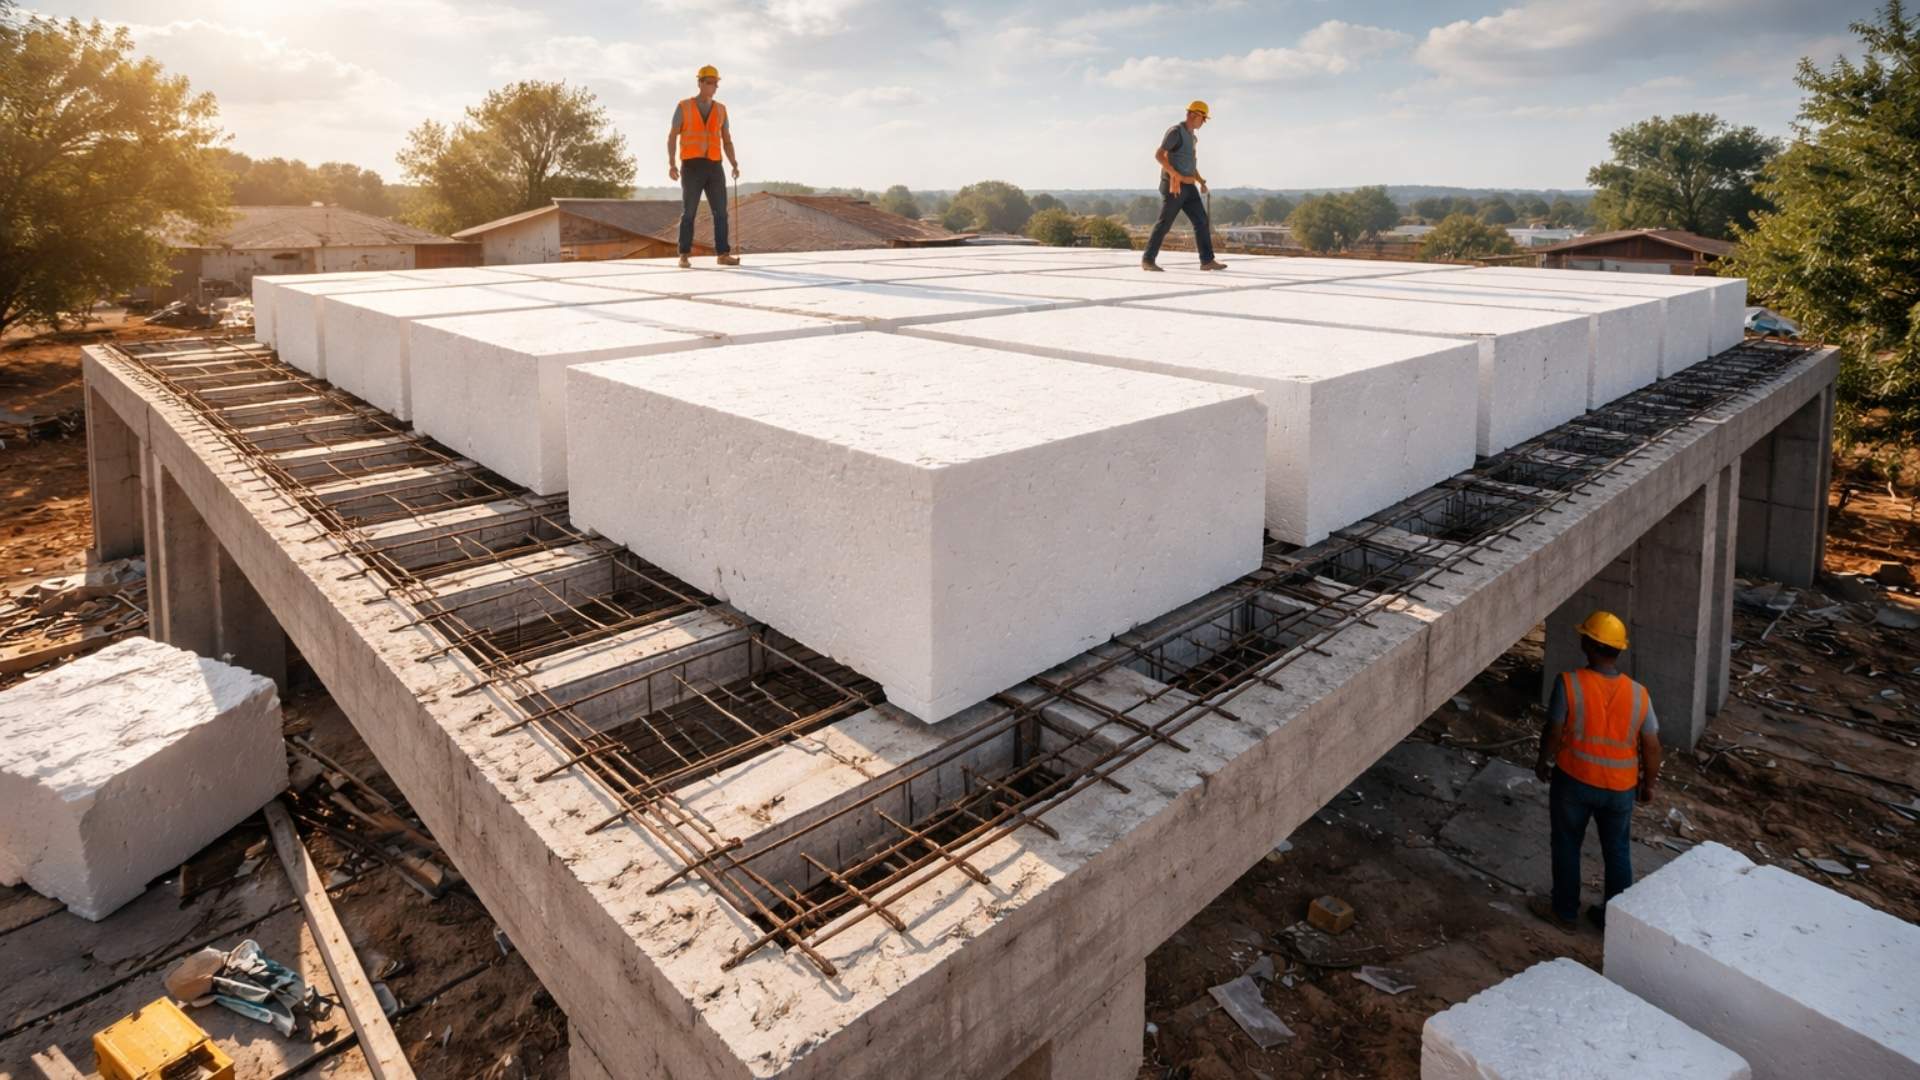
Forget concrete: architects are replacing tons of concrete with giant blocks of expanded polystyrene to build the roofs of houses and reduce structural weight by up to 50%, cut costs, improve thermal insulation, and speed up construction.
-
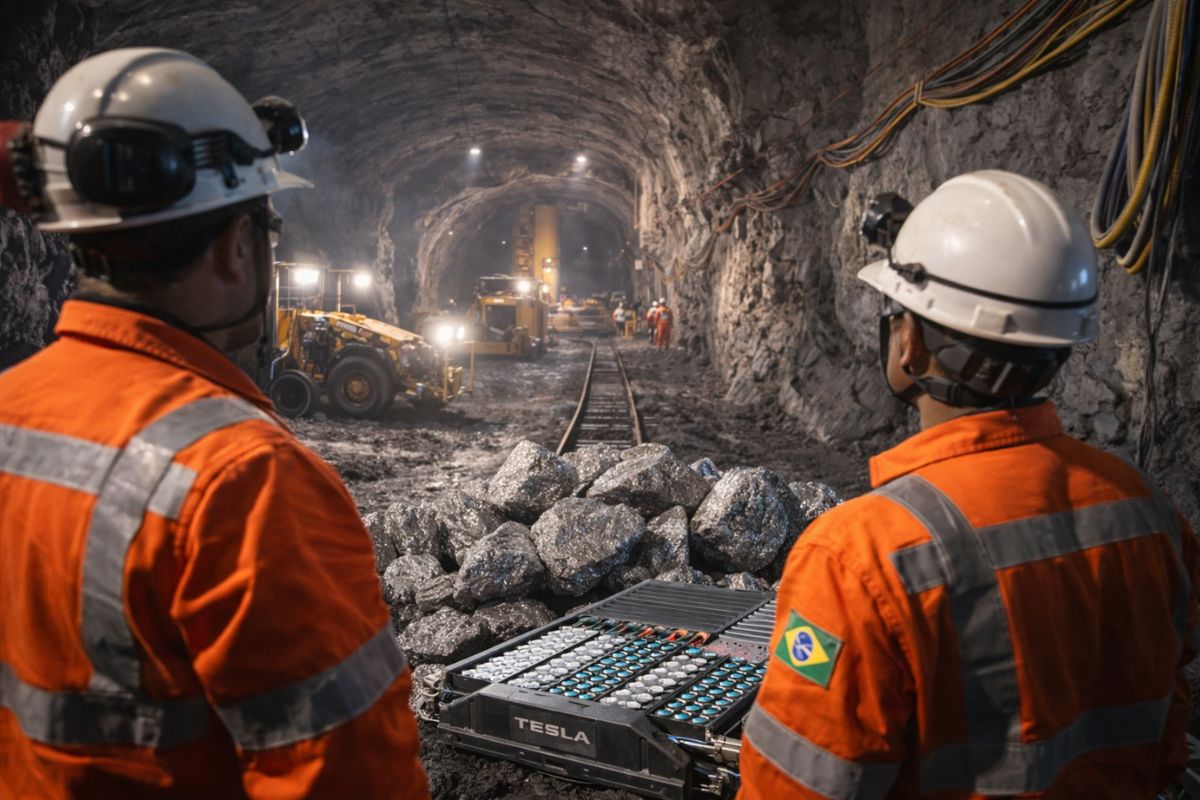
The Brazilian state enters the center of the global race for critical minerals by starting the construction of the largest underground nickel mine in Latin America, a mineral essential for electric car batteries that the entire world is competing for at this moment.
-
New CCR concrete paving technology promises roads up to 3x more durable, less maintenance, and cost reduction in Brazil.

Plaster and White Glue Mixture Creates Homemade Leveling Compound Used in Renovations
Among Small Renovation Professionals and DIY Enthusiasts, There Has Been a Simple Mixture Circulating for Decades That Can Be Used to Level Dry Internal Walls: Plaster Powder, PVA White Glue, and Water.
This Recipe Did Not Arise in a Laboratory Nor Is Part of Technical Standards for Civil Construction. It Has Been Informally Spread in Construction Sites and Home Renovations as a Practical Solution to Replace Finished Plaster in Specific Situations, Mainly When the Goal Is to Reduce Costs.
The Logic of the Mixture Is Relatively Simple. The Plaster Powder, Technically Called Semi-Hydrated Calcium Sulfate, Reacts With Water and Sets Quickly, Forming a Smooth and White Surface. This Same Principle Is Used in Various Industrial Finishing Products for Drywall and Plaster.
The PVA White Glue Acts as a Binder. It Improves the Adhesion of the Paste to the Wall and Reduces the Brittleness of Pure Plaster, Which Tends to Become Brittle and Powdery When Applied in Thin Layers. The Presence of the Glue Increases the Flexibility of the Dried Material and Helps Prevent the Layer from Coming Loose During Sanding.
The Result Is a Paste That Is Easy to Apply and Can Be Used to Correct Surface Imperfections and Prepare Internal Walls for Painting.
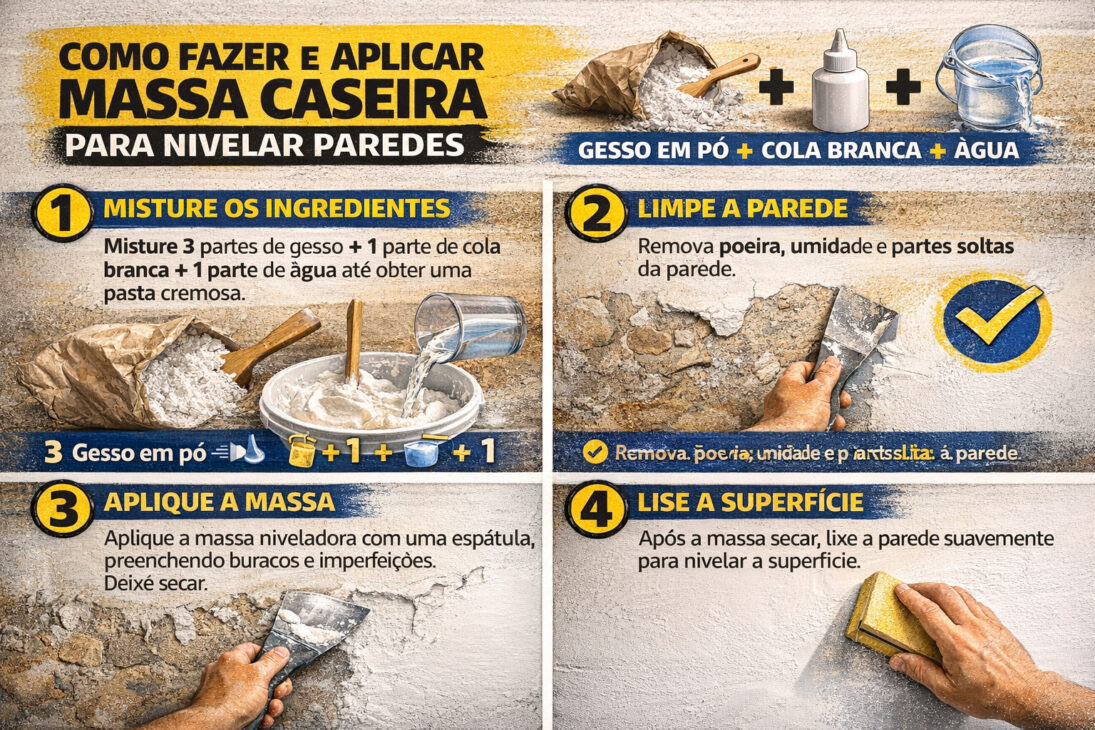
Ingredients and Proportions of the Homemade Leveling Compound
The Most Common Recipe for Homemade Leveling Compound Uses Only Three Ingredients.
- 500 g of Plaster Powder
- 200 ml of PVA White Glue
- Approximately 300 ml of Water (Adjustable)
These Quantities Yield Material Sufficient to Level About 5 to 6 m² of Wall, Depending on the Thickness of the Applied Layer. Plaster Powder Is Usually Sold in Construction Material Stores in 1 kg Bags, Generally Costing Between R$ 4 and R$ 6. PVA White Glue, Easily Found in Supermarkets or Stationery Stores, Costs About R$ 5 to R$ 8 for a 500 ml Bottle.
With These Values, the Total Cost of the Mixture to Treat a 30 m² Room Usually Ranges Between R$ 12 and R$ 20, a Value Significantly Lower Than the Expense with Industrialized Finished Plaster.
How to Properly Prepare the Homemade Leveling Compound
Preparing the Mixture Is Simple, but It Requires Attention to the Working Time of the Plaster, Which Starts to Harden Quickly.
First, Pour the Water Into a Clean Bucket and Add the PVA White Glue. Mix Well Until a Homogeneous Liquid Forms. Then, Gradually Add the Plaster Powder, Stirring Continuously Until You Achieve a Creamy Paste with a Consistency Similar to That of Thick Yogurt.
Since Plaster Begins the Hardening Process in About 20 to 30 Minutes, It Is Ideal to Prepare Small Quantities at a Time. This Way, You Avoid Waste of Material That Hardens Before Application.
This Characteristic Also Influences the Way of Working: Instead of Preparing Enough Material for an Entire Wall, It Is More Efficient to Work by Smaller Areas of Approximately 2 to 3 m².
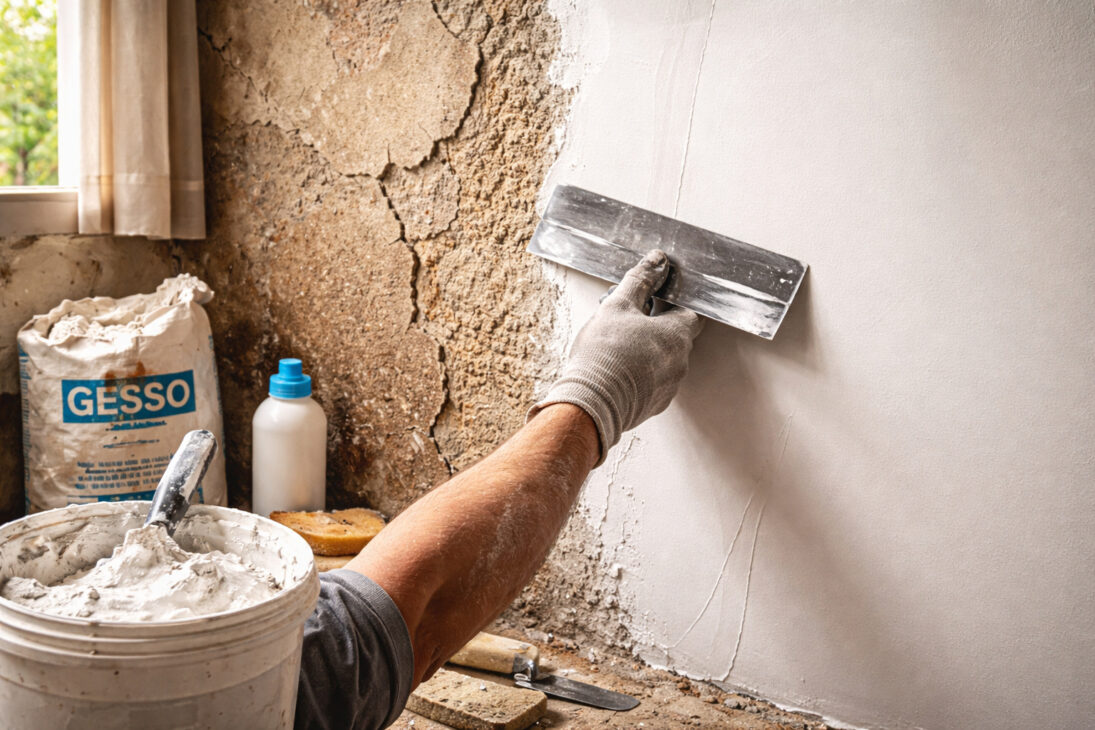
How to Apply Homemade Leveling Compound on the Wall
The Application of the Homemade Leveling Compound Is Similar to the Application of Conventional Finished Plaster. The Wall Must Be Clean, Dry, and Free of Loose Parts Before Starting Work.
First, Sand the Surface With a Coarser Sandpaper, Such as Grit 80 or 100, to Remove Larger Irregularities and Improve Adhesion of the New Layer. Then, Remove All Dust With a Brush or Dry Cloth.
With the Wall Prepared, Apply the Mixture Using a Steel Trowel or Wide Spatula, Spreading the Compound in Long and Even Strokes, Preferably From Bottom to Top. The Goal Is to Fill Small Imperfections and Create a Continuous Surface.
After About 30 Minutes, When the First Coat Is Firm, It Is Possible to Apply a Second Coat to Improve Leveling. After Complete Drying, Which Usually Occurs Between Three and Four Hours, the Wall Can Be Sanded With Fine Sandpaper, Such as Grit 120 or 150.
Sanding Removes Small Tool Marks and Prepares the Surface for the Final Preparation Step. After Removing the Dust, It Is Recommended to Apply Acrylic Sealer or Primer, Ensuring That the Paint Is Absorbed Evenly. The Final Result Is a Smooth, White Wall, Suitable for Receiving Acrylic or PVA Paint.
Cost Comparison Between Homemade Leveling Compound and Industrial Finished Plaster

When Compared to Industrial Finished Plaster, the Cost of the Homemade Mixture Can Be Significantly Lower. For a Room of Approximately 30 m², the Homemade Compound Uses About 2.5 kg of Plaster and Approximately 500 ml of Glue. This Set Usually Costs Between R$ 17 and R$ 23.
On the Other Hand, a Can of 25 kg Finished Plaster, Necessary for the Same Area, Can Cost Between R$ 55 and R$ 110 Depending on the Brand and Region. This Means That the Homemade Solution Can Represent Over 70% Savings in Wall Leveling Costs.
Limitations of the Homemade Leveling Compound
Despite the Savings, the Mixture Has Some Important Limitations That Need to Be Considered. The First of Which Is the Application Environment. The Plaster and Glue Mixture Should Not Be Used in Humid Areas, Such as Bathrooms, Kitchens, or Service Areas. In These Situations, Constant Contact With Moisture Can Cause Stains, Softening, and Peeling of the Applied Layer.
Another Limitation Is Related to the Depth of the Imperfections. The Mixture Works Well for Fine Leveling, Correcting Small Waves and Surface Marks. However, Defects Larger Than Approximately 5 Millimeters Need to Be Corrected First With Mortar or Plaster.
It Is Also Important to Remember That the Working Time of the Mixture Is Shorter Than That of Industrial Finished Plaster. On Very Large Surfaces, This Can Make Continuous Application Difficult, Requiring Frequent Preparation of New Portions of Material.
Why Pure Plaster Does Not Work as Well as the Mixture
A Common Question Is Why Not Just Use Plaster and Water to Level the Wall. The Reason Lies in the Resistance of the Final Layer.
Pure Plaster Tends to Become Brittle When Dry, Especially When Applied in Thin Layers. During Sanding or When Leaning Furniture and Objects Against the Wall, Small Parts Can Easily Come Loose.
The Presence of PVA White Glue Acts as a Binder That Improves Adhesion and Flexibility of the Layer, Reducing Powdering and Increasing the Durability of the Finish.
Some Professionals Even Add a Small Amount of Industrial Finished Plaster to the Mixture — About 10% of the Total Volume — to Improve Plasticity and Facilitate Sanding. Even With This Addition, the Final Cost Remains Significantly Lower Than Using Industrialized Plaster Alone.
When the Homemade Leveling Compound Can Be a Good Choice
The Homemade Leveling Compound Is Best Suited for Simple Renovations in Dry Internal Environments, Such as Bedrooms, Living Rooms, and Hallways. It Is Often Used by Those Painting Their Own Homes, Renovating a Property for Personal Use, or Finishing Lower-Cost Constructions.
When Plaster Is Already Available on the Job Site, Costs Can Drop Even Further. In These Cases, the Only Additional Material Needed Is Glue, Which Costs a Few Reais and Lasts for Various Rooms.
Under Proper Usage Conditions, the Finish Obtained Can Be Quite Similar to That of Conventional Finished Plaster on Dry Internal Walls. The Main Difference Lies in the Technical Certification of the Product, Not Necessarily in the Final Visual Aspect of the Wall.


-

-

-

-

12 pessoas reagiram a isso.