





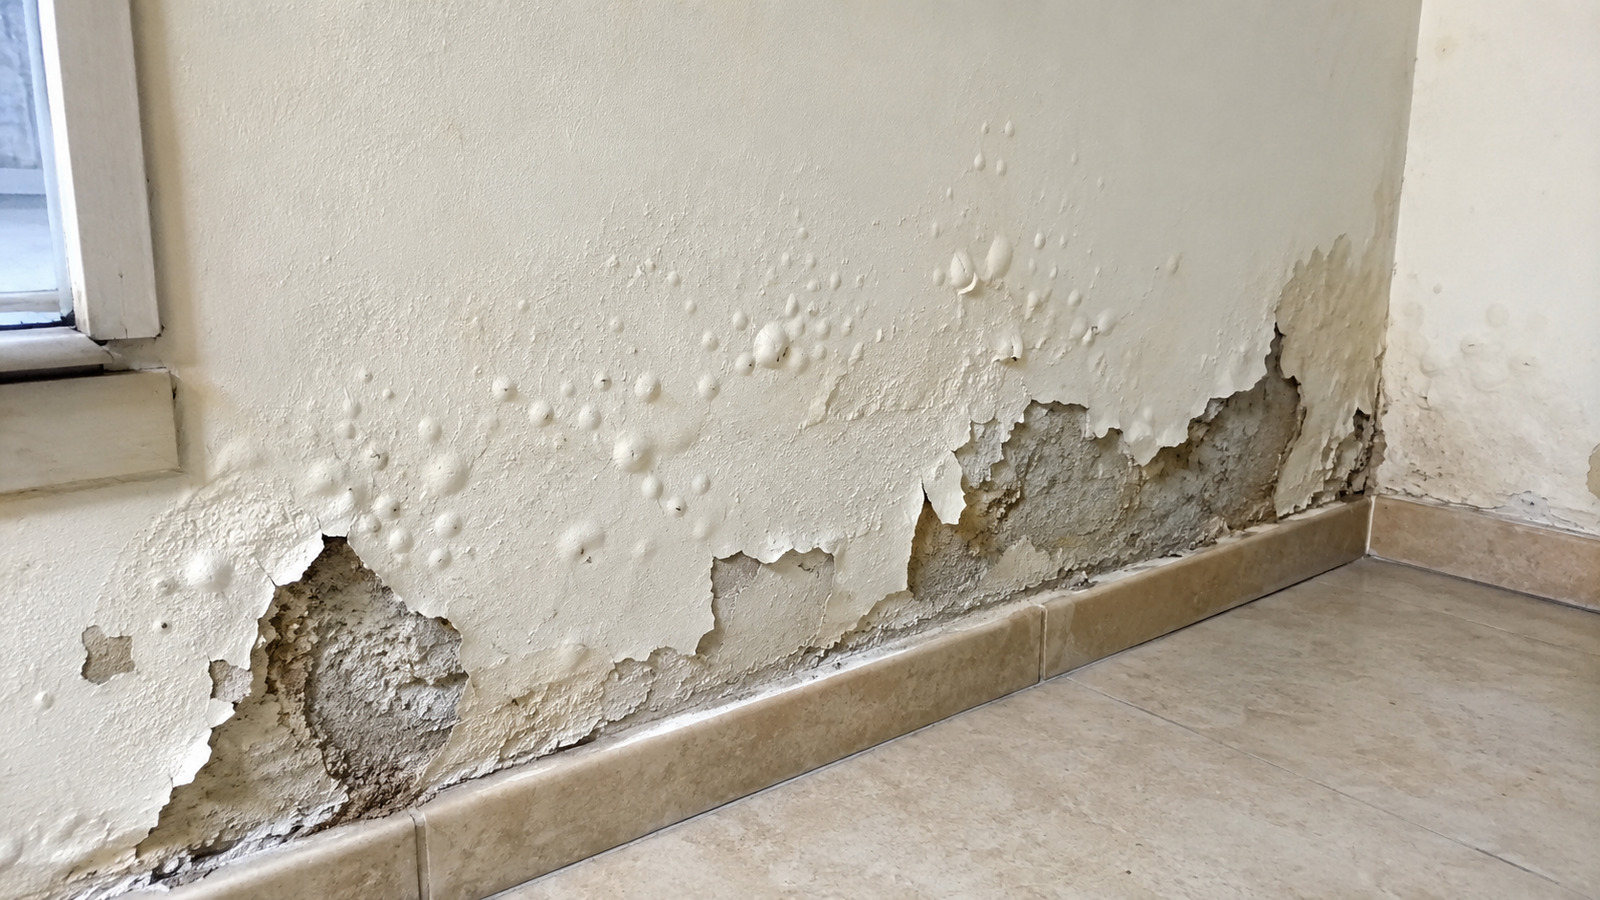

Bubbles, peeling paint, and exposed plaster indicate moisture under the finish; see how to identify the source of the water, properly prepare the wall, choose the right products, and prevent the problem from returning
A swollen wall is not just a defect in the paint. The bubbles and loose patches usually show that there is moisture acting under the finish. To prevent the problem from returning, it is necessary to identify the water entry, correct its source, wait for complete drying, and apply the products in the correct sequence.


Swollen wall can reveal different types of moisture
Bubbles appear when moisture gets trapped between the wall and the finish. Over time, the water pushes the paint and plaster, causing cracks, peeling, and surface exposure.
The source may be external leaks, pipe leaks, lack of waterproofing, condensation, or moisture rising from the floor. The location of the stains helps identify the path taken by the water.
-
Latin American island gets tired of rats and turns to GPS-guided helicopters as a trump card to spread bait over 17,000 hectares after 12 years of planning in an operation that mobilized residents and scientists.

-
Twenty years after leaving college to take care of her children, a 48-year-old woman returned to the classroom, shared study materials, assignments, and the same class with her 26-year-old daughter for almost nine years, received a Pedagogy degree alongside her, and today both teach at the same school in Alagoas.

-
Diagnosed with severe aplastic anemia at 17, a young man from Pará receives a bone marrow transplant from his sister, undergoes chemotherapy, faces infections and isolation, but continues studying, takes the Enem exam inside the hospital after a court decision, and secures spots in Medicine at three public universities.

-
Young woman woke up at 4:40 AM to balance school, internship, and prep course until nearly midnight: raised by her grandmother and a public school student, Laura Jeovana secured a spot in Administration at the State University of Ceará.




When the problem starts near the baseboard, there may be rising damp. Bubbles near the ceiling may be related to faults in gutters, slabs, roofs, or external walls.
Stains behind bathrooms, kitchens, and service areas may indicate problems in the piping. The smell of mold shows that the surface remains wet for prolonged periods.
Paint peeling in various spots may also be a consequence of inadequate preparation done before the previous painting, especially when the finish was applied over dust, weak plaster, or still damp walls.

Water entry must be eliminated before repair
Scraping and repainting without correcting the cause of moisture is one of the most common mistakes. Even with new products, the water will continue to press against the finish until the bubbles reappear.
If there is a leak, the plumbing needs to be repaired. When the infiltration comes from the outside, it may be necessary to fix cracks, gutters, slabs, roofs, or waterproofing failures.
In cases where moisture rises through the baseboard, the wall may need specific treatment against rising damp. The type of correction depends on the water’s entry point.
After eliminating the cause, the wall must dry completely. The process may require a few days of dry weather, constant ventilation, and monitoring of the stain to confirm that it has not grown back.
Preparation requires scraping, cleaning, and complete drying
With the surface dry, all loose paint, soft putty, and non-adherent parts must be removed. The scraping needs to go beyond the apparently damaged area, as the nearby edges may also be compromised.
Next, the transitions should be sanded to reduce unevenness. All dust must be removed with a dry cloth or clean brush, as dirt can impair the adhesion of materials applied later.
When there is mold, the wall must be sanitized before finishing. The procedure requires ventilation, the use of gloves, and care to avoid mixing incompatible chemical products.
The sequence includes scraping weak parts, sanding the edges, completely removing dust, treating mold, and waiting until the surface is completely dry.
Products need to be suitable for the environment
In dry indoor areas, the sealer can help to even out absorption. Walls with a history of moisture may require a preparatory base, compatible waterproofing, or repair mortar before applying the putty.
Common putty is not recommended for damp areas. In bathrooms, laundries, external walls, and places subject to water, acrylic putty usually offers greater resistance, provided the infiltration has already been resolved.
The paint should be applied in thin layers, respecting the drying time between coats. Excess paint, poorly prepared surfaces, or residual moisture can cause new bubbles.
Dry areas accept PVA paint. Humid environments require more resistant products, such as acrylic or epoxy paint, always considering the compatibility between base, putty, and finish.
Prevention includes ventilation, cleaning, and periodic inspections of gutters, flashings, joints, cracks, roofs, and plumbing. Small external failures can allow water entry and compromise the entire internal painting.
This article was prepared based on the information from the provided base material, with guidelines, steps, and recommendations preserved according to the consulted content.


