 Portuguese
  English
  Spanish
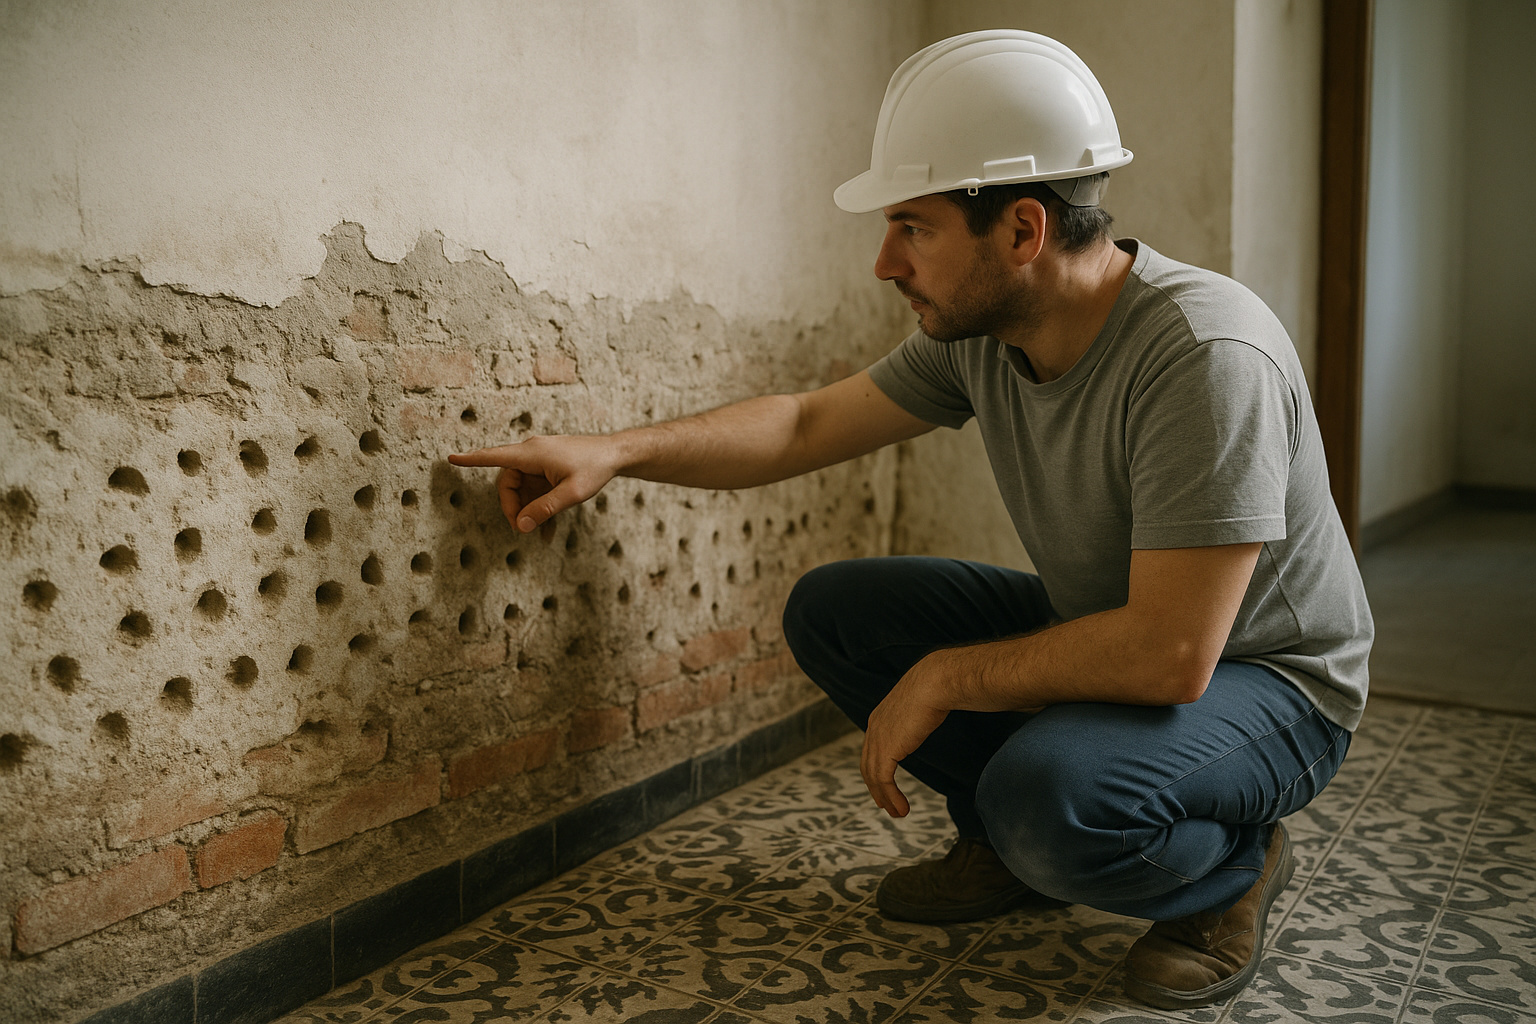
Breathable Method Applied Internally Creates Barrier Against Infiltration, Reinforces Plaster, and Allows the Wall to Release Vapor Without Accumulating Moisture, Ensuring Durable Results Even in Homes Without External Access
Rising moisture — the kind that rises from the foundation and compromises plasters, paints and coatings — affects between 70% and 85% of homes in Brazil, according to experts in waterproofing and structural recovery. In many properties, especially those built without chemical barriers or with old foundations, the problem manifests between 70 and 100 centimeters high, causing constant infiltration, rotten plaster, and persistent stains.
The information was detailed in technical content released by industry professionals, who explain that moisture from capillarity is just one of the ways in which water compromises walls. In addition to this, there is what is called positive moisture, when water enters from the outside to the inside, and negative moisture, when water inside the wall tries to escape to the outside. In both cases, the process occurs because the wall needs to “breathe,” releasing moisture in the form of vapor — something that rarely happens when inappropriate products are applied.
The Wall Needs to Expel Vapor, But Non-Breathable Products Prevent the Process
In many homes, residents try to solve the problem with conventional paints, compounds, and sealants that create a waterproof surface film. This type of product blocks the passage of vapor, preventing the wall from releasing accumulated moisture. As a consequence, the internal compound rots, bubbles appear, white stains known as efflorescences develop, and the plaster easily detaches.
-
According to an analysis by NASA, only one human-made structure is visible from space, and it is not the Great Wall of China or the Pyramids of Egypt.

-
After 377 years of history, the Brazilian Army will have its first female general: Colonel Claudia Cacho has been promoted to brigadier general by Lula and will receive the sword and command baton this Wednesday in Brasília.

-
A Mercado Livre customer opened their package and found 32 resumes of people looking for jobs crumpled as protective paper inside the box, exposing names, addresses, documents, and phone numbers of dozens of candidates.
-
Iceberg A23a, one of the largest in the world, is undergoing accelerated collapse and may disappear: what explains the end of the ice giant?


For specialists, the problem is not the amount of moisture, but the wall’s inability to breathe it. Just as the human body contracts and expands its pores according to the weather, the correct materials must also react to heat and cold, allowing vapor to escape while preventing liquid water from entering.
Therefore, modern waterproofing technologies have been developed precisely to offer this dual function:
– Block the entry of liquid water,
– Allow the exit of moisture in the form of vapor.
Breathable Technology is the Only One Capable of Blocking the Rise of Water and Preserving the Plaster
The recommended technical solution involves specific products designed to operate in a breathable manner. Among them are:
- SOS Moisture – applied directly to the baseboard after linear holes, creates an internal barrier that prevents rising moisture from moving upward.
- SOS Concrete – used in the mortar and plaster, is water-repellent, mold-resistant, waterproof, and vapor-permeable.
- Smart Resin (Smart Zina) – acts as a breathable sealant and primer, safely controlling the exit of moisture.
- Smart Fit Color – high coverage and resistance paint, waterproof and ideal for final finishing.
According to technicians, after the correct application, the wall functions again as a balanced system: the barrier blocks the water rising, while the breathable coatings allow the vapor to escape gradually.

Step 1: Complete Removal of Deteriorated Plaster to Reveal Clean Structure
The process begins with the total removal of compromised plaster. The wall must be completely exposed and clean, without any dust or crumbling residue. After removal, a broom is used to eliminate loose particles.
In the baseboard area, aligned holes are made:
- Distance between holes: 10 cm
- If the drill is 10 mm → holes every 10 cm
- If it is 12 mm → holes every 12 cm
- The distance increases with the drill bit size
The internal dust from the holes is removed with a simple balloon inflator, a low-cost solution that ensures proper cleaning for the application of the chemical barrier.
Step 2: Application of SOS Moisture to Block the Rise of Water
With the holes cleaned, the application of SOS Moisture begins. The product comes in ready-to-use tubes and is inserted into each hole through an applicator. When injected, the material spreads linearly, reaching the sides and creating a continuous layer.
The goal is to form a barrier that interrupts the rise of ascending moisture.
The wetter the wall is, the better the effectiveness, as the product spreads more easily. After application, the wall already has permanent structural defense against capillary infiltration.
Step 3: Reconstruction of the Wall with Water-Repellent and Breathable Plaster
With the barrier installed, the new plaster begins using SOS Concrete in the mortar. This product has specific properties:
- Water-repellent
- Efflorescence reducer
- Mold-resistant
- Waterproof
- Vapor-permeable
The mix used is:
- 3 parts sand + 1 part cement
For each mix, 4 caps of SOS Concrete are added.
The mixture must be homogeneous to ensure strength. According to technicians, the most common mistake is “saving on the mixture,” which results in a weak and easily removable plaster.
Since the wall is already wet, it should not be wetted again before plastering. If wet, the drying process can become virtually impossible.
After the plaster is applied, the natural drying period begins.
Scraping, Stabilization, and Using Smart Resin to Control Vapor
After the initial drying period, scraping begins to remove any remaining crumbling material. In many cases, the wall shows fragile areas due to its moisture history, and this step ensures that no residue worsens the next layers.
Next, the Smart Resin (Smart Zina) comes into play, a breathable sealant applied in one or two coats. Its technology allows vapor to escape in a controlled manner while preventing the entry of liquid water — an essential balance for walls with pre-existing moisture.
The application is demonstrated practically: half of the peeled area receives the Smart Resin, while the other half remains untreated. After about 1 hour, a comparative water test is performed. The result is evident:
- Part with Smart Resin: virtually zero absorption, no dust, and no loose flakes.
- Part without Smart Resin: strong absorption, easy peeling, and particle release.
This behavior reinforces the product’s role as the best breathable sealing primer within the technical recovery proposal.
Acrylic Compound, Leveling, and Final Preparation Before Painting
After the Smart Resin action, the wall is ready to receive the intermediate finish. In the demonstrated case, the choice was for acrylic compound, sold in bags and with the advantage of allowing the applicator to adjust the amount of water according to the desired texture — firmer or creamier.
The compound is mixed until it reaches a homogeneous point and then applied across the entire surface. Since the wall has been completely reconstructed, any unevenness is corrected during this stage.
The process ensures:
- Leveling
- Correction of imperfections
- Preparation for final painting
The compound must dry adequately before the next stage. Under normal conditions, the ideal would be to wait for 28 days for total curing. However, since the wall is protected with breathable technology, it is possible to proceed with 24 hours of interval, without compromising performance.
Painting with Smart Fit Color: High Coverage, Waterproofing, and Resistance
The final step is painting, performed with Smart Fit Color, developed for surfaces requiring high protection. The formula offers:
- Waterproofing
- Mold resistance
- Crack prevention
- High coverage
- Application on concrete, drywall, plaster, compound, and acrylic
The paint comes ready and only needs to be homogenized before use.
The application occurs in two coats, with an interval of 4 hours. Even with intense stains from the old paint, coverage is uniform from the first application, and the second coat finishes the color correction of the surface.
The result is a visually new wall, protected, and with significantly superior performance compared to its original state.
Wall Ready for Laminate Flooring Installation, Even in Areas Previously Considered “Prohibited”
An important technical detail highlighted by specialists is that laminate flooring should not be installed in areas with moisture or water contact. However, since the entire wall has been treated with products that block the rise of moisture and regulate internal breathing, the environment now offers safe conditions to receive the laminate — something that was not previously possible.
The treatment adopted:
✔ Prevents capillarity
✔ Controls internal vapor
✔ Avoids deterioration of the baseboard
✔ Ensures stability of the coating
With this, the customer can install the flooring peacefully, without risk of deformation, mold, or warping.
The Importance of Using Appropriate Products and Qualified Labor
Throughout the intervention, specialists emphasize that moisture problems do not arise solely due to a lack of waterproofing, but also from the use of inappropriate products and unqualified labor. When two walls meet — as in the case of the house wall and the neighbor’s wall — moisture tends to move laterally, causing damage even after amateur repair attempts.
Therefore, they insist that:
- Breathable products are indispensable
- Common sealants do not solve the problem
- Wrong waterproofing compounds worsen the situation
- External interventions are not always possible
- The correct solution must be applied from the inside
Iva Química do Brasil is cited as responsible for bringing to the country the technology capable of offering breathable and effective products for treatment of rising moisture — something ignored by competitors in the market.
The Only Real Solution is Internal, Breathable, and Based on Chemical Barrier + Water-Repellent Plaster
The demonstrated method follows a logic that has been consolidating as a professional standard in the country:
- Complete Removal of Deteriorated Plaster
- Technical Drilling and Application of SOS Moisture
- Creation of the Internal Chemical Barrier Against Capillarity
- New Plaster with SOS Concrete (Water-Repellent and Breathable)
- Application of Smart Resin as Vapor Regulator
- Leveling with Acrylic Compound
- Waterproof Painting with Smart Fit Color
The final result is a healthy wall, protected, and with a balanced moisture release cycle — without risk of bubbles, stains, peeling, or return of infiltration.


Seja o primeiro a reagir!