 Portuguese
  English
  Spanish
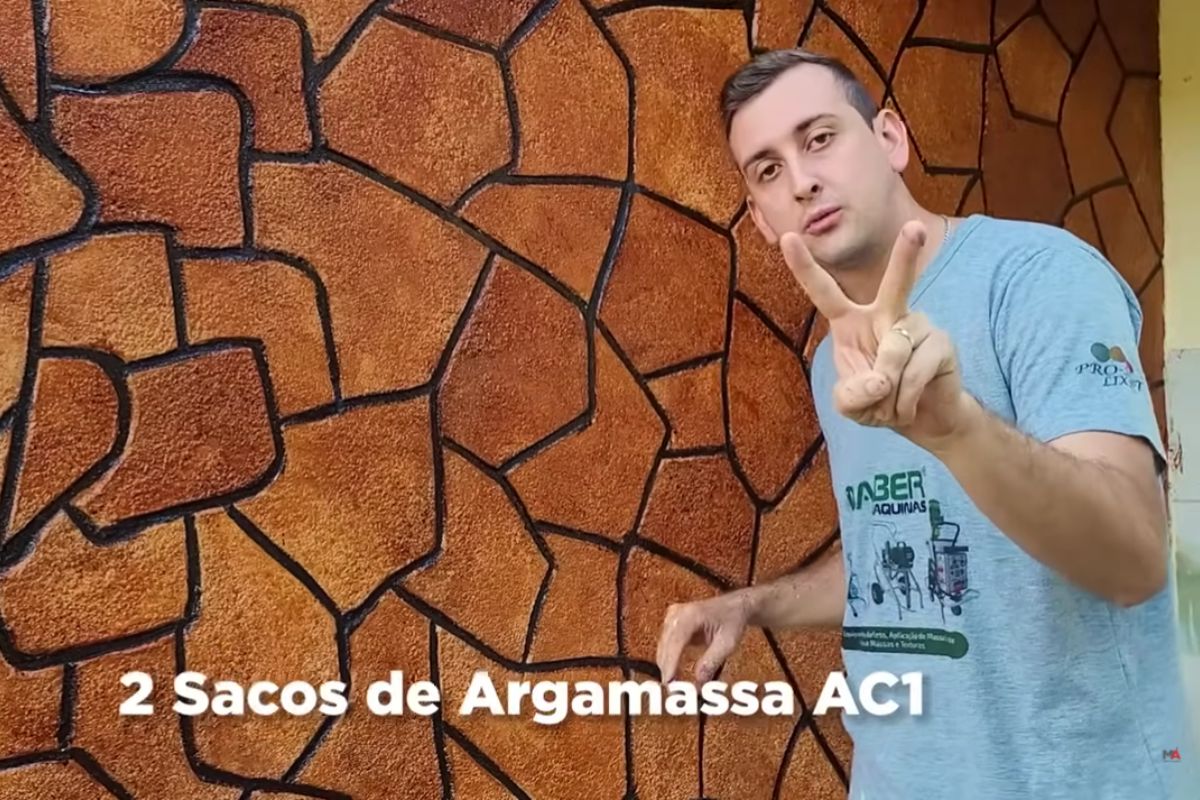
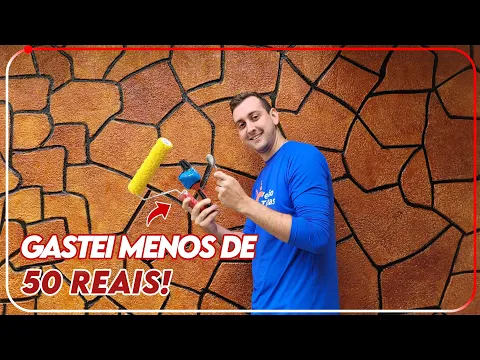
With Cheap AC1 Mortar, Rolling Pin, Water-Based Paint and Varnish, Finishing Master Transforms Exposed Brick into Natural Stone Wall for Less Than 50 Reais, with Realistic Relief, Varied Colors, and Protection Against Moderate Rain, Suitable for Simple Indoor Brick or Plaster Walls
In just a few days of continuous work, between applying the mortar and the final coats of varnish, a finishing master demonstrated step by step how to transform a simple exposed brick into a convincing natural stone wall, with relief, grout, and shine like real stone using only AC1 mortar, paint, dye, and varnish. The job was done on a prepared wall, but the method also works directly on raw brick, as long as the base is solid and without loose parts.
The final result is a panel with irregular texture, hand-drawn cuts, and color variation between the “stones,” visually similar to a high-cost cladding. The key difference lies in the budget: by fractioning the materials, the stone wall costs less than 50 reais, compared to around 300 reais or more for a similar area with real natural stone, according to the professional’s own calculations.
How the Finishing Master Creates the Base of the Stone Wall

The process begins with preparing the base.
-
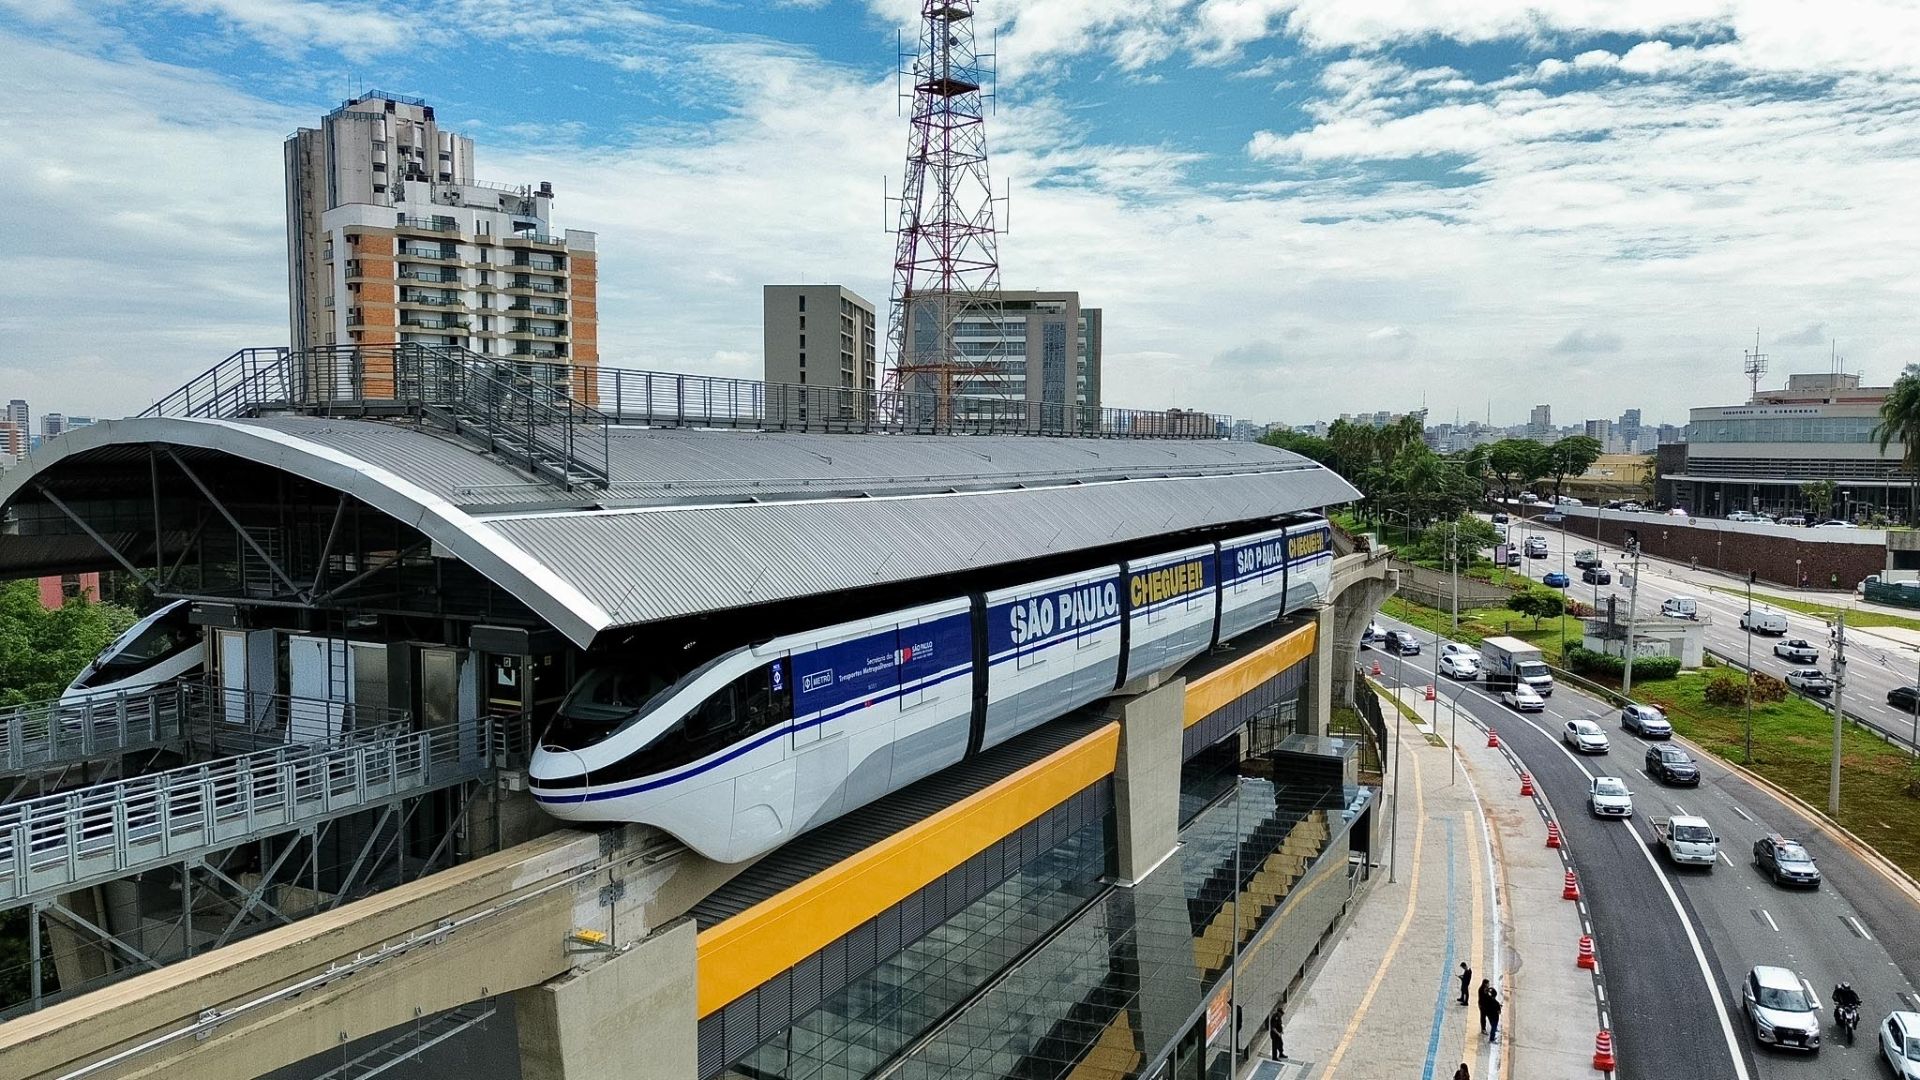
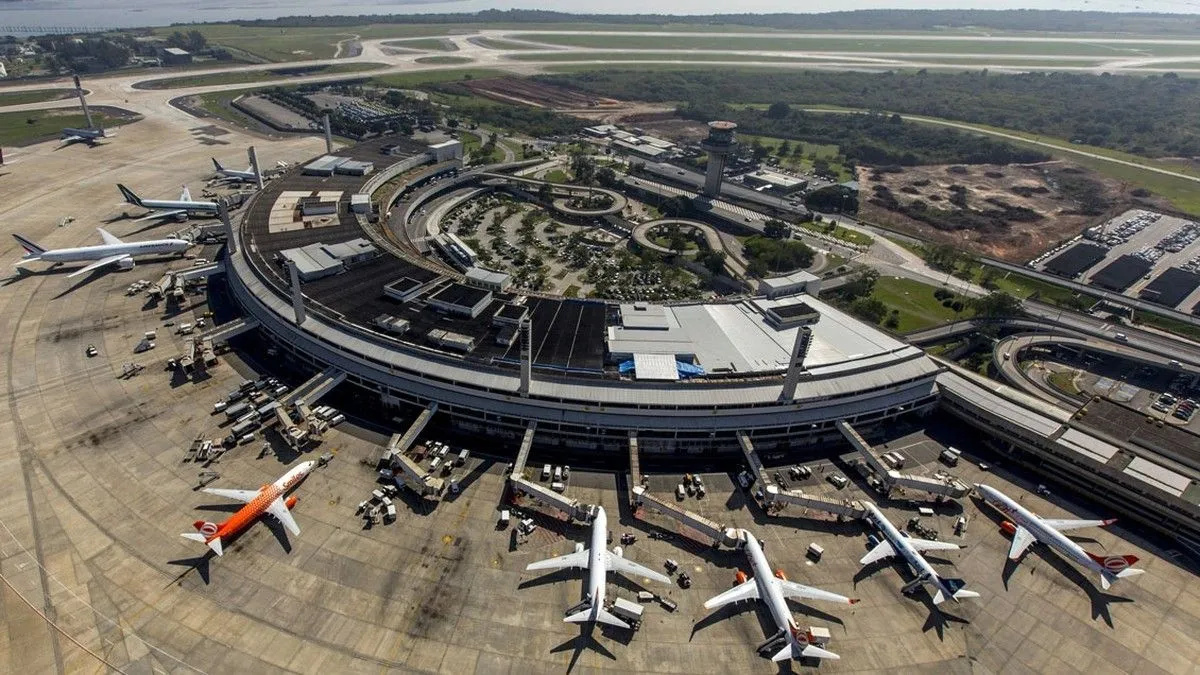
Congonhas receives the monorail promised for the 2014 World Cup after more than a decade of delays and becomes the first airport in Brazil with integrated subway.
-
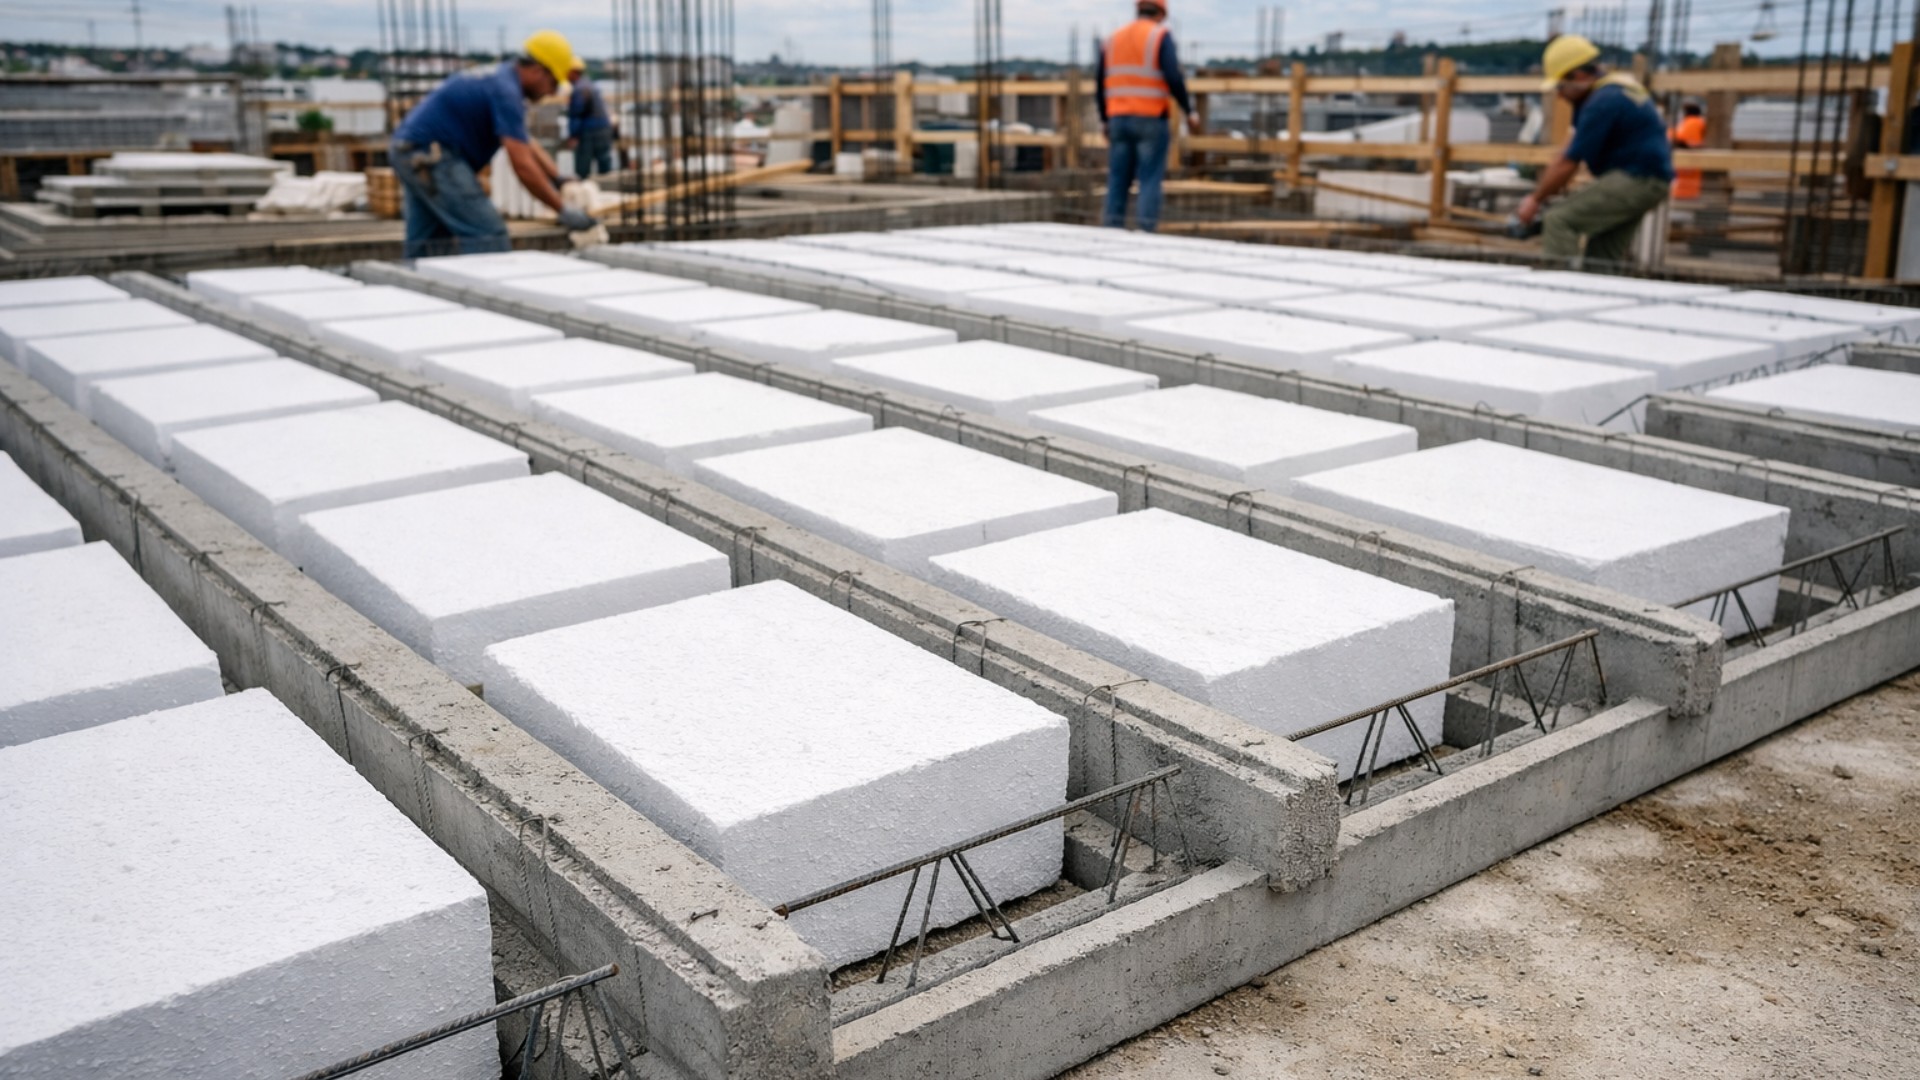
Goodbye, concrete: a new trend in civil construction reduces the weight of the structure by up to 30%, accelerates projects by up to 40%, cuts costs on steel and labor, and improves thermal insulation with EPS.
-
Russian engineers create an innovative propeller blade for aircraft that could completely change the way airplanes and helicopters operate.

-
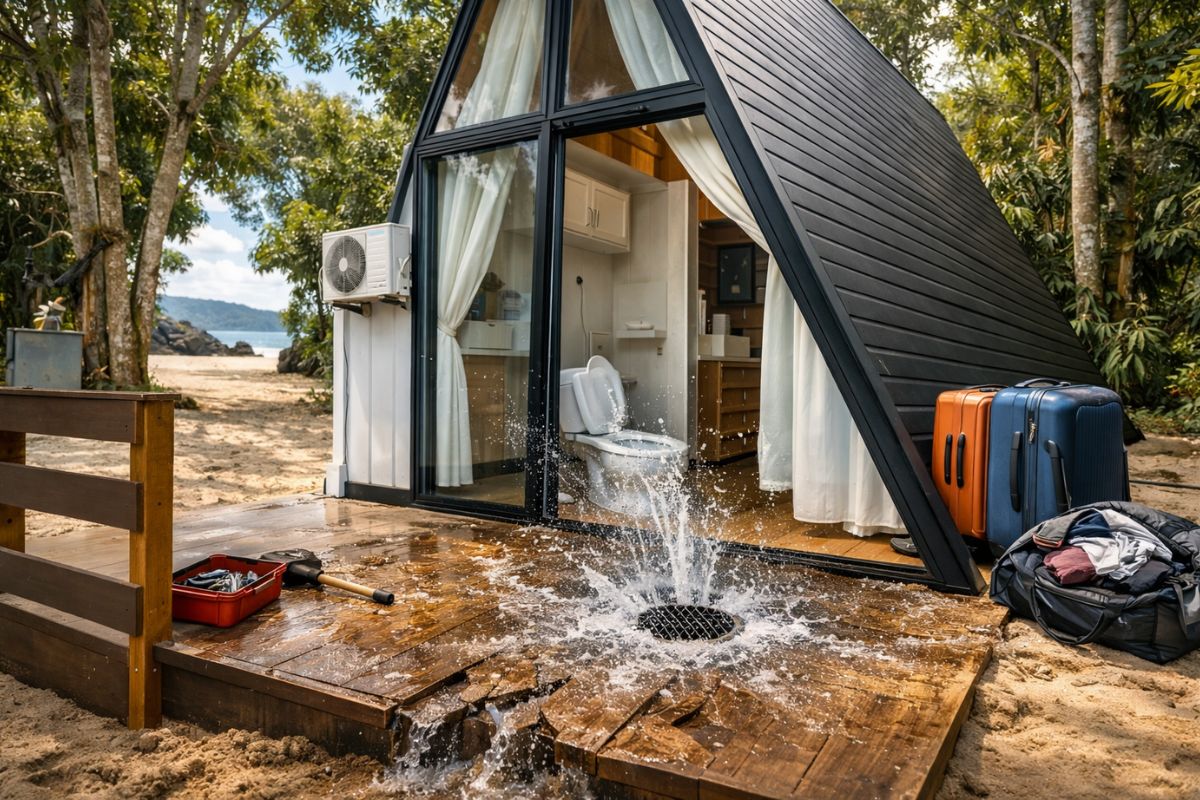
Couple finishes building PVC chalet on the beach on the last day, with air conditioning and curtains, but discovers the bathroom drain is inverted: water escapes from the drain, risking breaking the floor, and the rush continues before the trip.

When the surface is already plastered, the professional applies a primer or resin to ensure adhesion and regulate absorption, creating a stable base for the stone wall effect.
In the case of exposed brick, it is enough to ensure that there is no loose dust, broken parts, or peeling plaster before moving on to the mortar.
Next, the AC1 mortar is applied, chosen precisely for being cheap and sufficient for indoor areas or places where rain does not hit directly.
The mixture is made with water in a bucket, in small amounts to avoid waste.
The goal is to obtain a thick and pasty mass, capable of forming a relatively thick layer, which allows for cuts and texture without collapsing.
With the mixture ready, the finishing master uses a trowel and spatula to spread the mortar on the wall, maintaining a thicker layer than a simple plaster job.
He avoids smoothing it too much and leaves intentional ripples on the surface, as these irregularities will enhance the visual reading of a natural stone wall after painting and varnishing.
Rolling Pin and Spoon Create the Natural Stone Relief

While the mortar is still wet, the texture roller known as “angel hair” or rolling pin, with harder nylon bristles, is used.
The roller is moistened in water and pressed against the surface, creating a pattern of grooves and highs and lows.
The stronger the pressure, the more pronounced the relief of the future stone wall, and the lighter the pressure, the more subtle the effect.
Once the entire area is textured, the drawing of the stones themselves begins.
Instead of special tools, the professional uses a simple dessert spoon to scratch the joints, cutting irregular blocks, larger and smaller, as if marking hand-fitted stones.
The greater thickness of the mortar allows for creating edges and “bellies” of stone, which enhances realism.
In the next step, as the mixture begins to firm, a damp brush is carefully passed over the edges of the cuts to remove excessive burrs and refine the finish.
This adjustment prevents the stone wall from appearing too rough, maintaining the sensation of natural stone, but with a clean enough joint to look like professional work rather than just scratched mass.
Complete Drying and Layered Painting for Depth
With all the texture and all the cuts ready, the finishing master pauses the process and lets the wall dry completely, which takes at least one additional day.
Only when the surface is dry to the touch does the stone wall receive the first color.
He uses paint in an ivory shade as a base, or white paint adjusted with ochre dye until reaching a background tone similar to that of light natural stone.
The entire surface is covered with this tone, filling even the “veins” and cuts between the stones. Then, specific stones receive more ochre dye, creating darker spots.
The goal is to break the monotony and simulate a mosaic with slightly different colored stones, as happens in natural walls and coverings.
This color variation is essential for the stone wall not to appear as just a flat block of paint.
Dark Grout and Varnish Create Shadow and Shine of Stone
To highlight the divisions, the professional prepares a dark paint, usually black, obtained from black dye mixed with white base.
With an improvised fine brush (bent brush secured with masking tape), he outlines all the joints between the stones, as if he were grouting real cladding.
The contrast of black creates artificial shadows and visually deepens the design of the stone wall, reinforcing the separation between each block.
In the final phase, water-based varnish, usually in a diluted mahogany tone, is applied.
First, he applies the varnish over the entire surface, sealing the paint and protecting the stone wall from splashes, periodic cleanings, and moderate humidity.
Then, he reinforces the product on specific stones, slightly darkening certain areas to enhance the play of light and shadow and increase the sense of depth.
As natural stone is rarely uniform, the varnish applied in different layers on each block helps to create that typical irregular appearance of real rocks.
The result is a stone wall with a soft shine, texture perceptible to the touch, and convincing visual reading, even for those observing up close.
How Much Does It Really Cost to Make the Stone Wall
By adding up all the supplies used, the finishing master arrives at an approximate cost of less than 50 reais for a small stone wall.
He used two bags of AC1 mortar, around 10 reais each, two bottles of checkered dye at 5 reais, in addition to small fractions of paint, varnish, and materials he already had in stock, like the texture roller.
If the same area were to be covered with real natural stone, the professional estimates that the cost of labor and materials would easily exceed 300 reais, even in a conservative scenario.
The difference in cost is what transforms the effect into a viable alternative for those who want a stone wall at home without undertaking major renovations or compromising the renovation budget.
In practice, anyone with the patience to follow the step-by-step process, respect the drying time, and practice using the rolling pin and spoon for cutting can achieve a similar result, as long as they protect the floor and surrounding surfaces well before starting.
The technique requires more care than strength, and a good part of the result comes from observing photos of natural stones to copy variations in shape and color.
Given such a cheap method, based on mortar, paint, and varnish, would you consider transforming a simple wall in your home into a stone wall with this effect or would you still prefer to invest in real natural stone cladding, even paying several times more?


-

-

-

-

9 pessoas reagiram a isso.