 Portuguese
  English
  Spanish
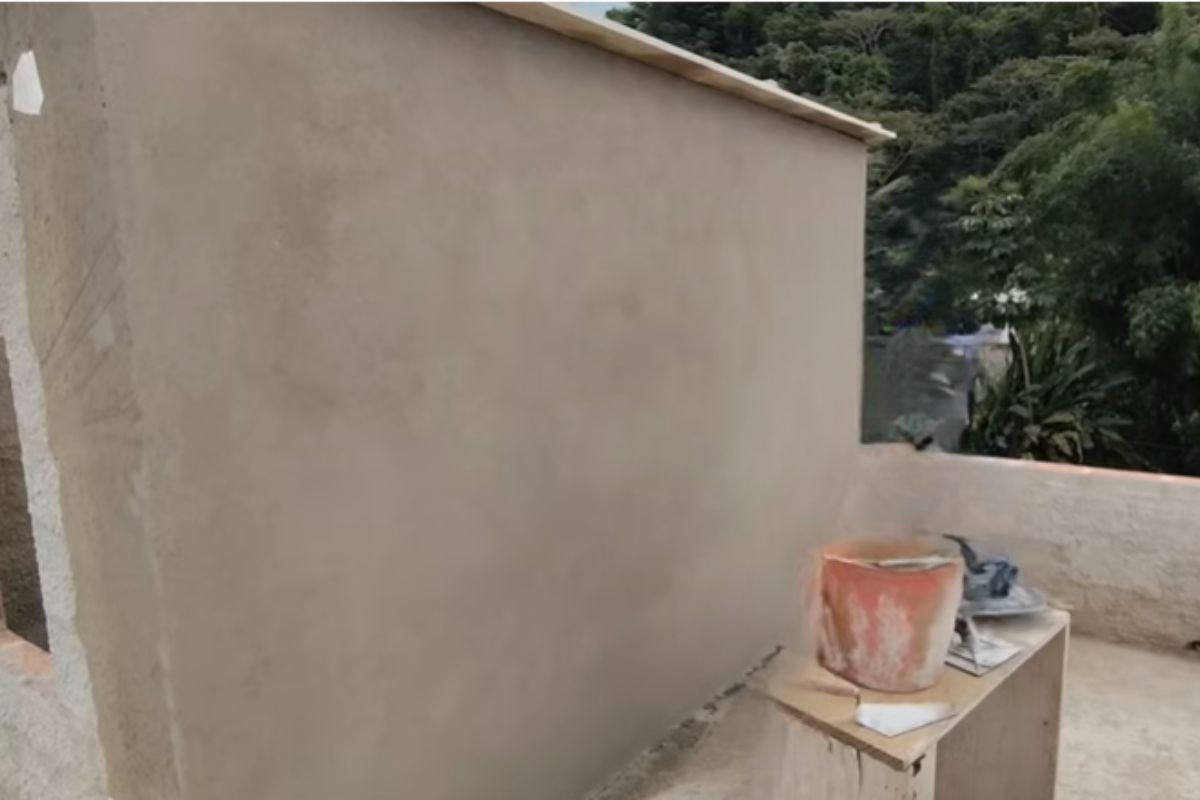
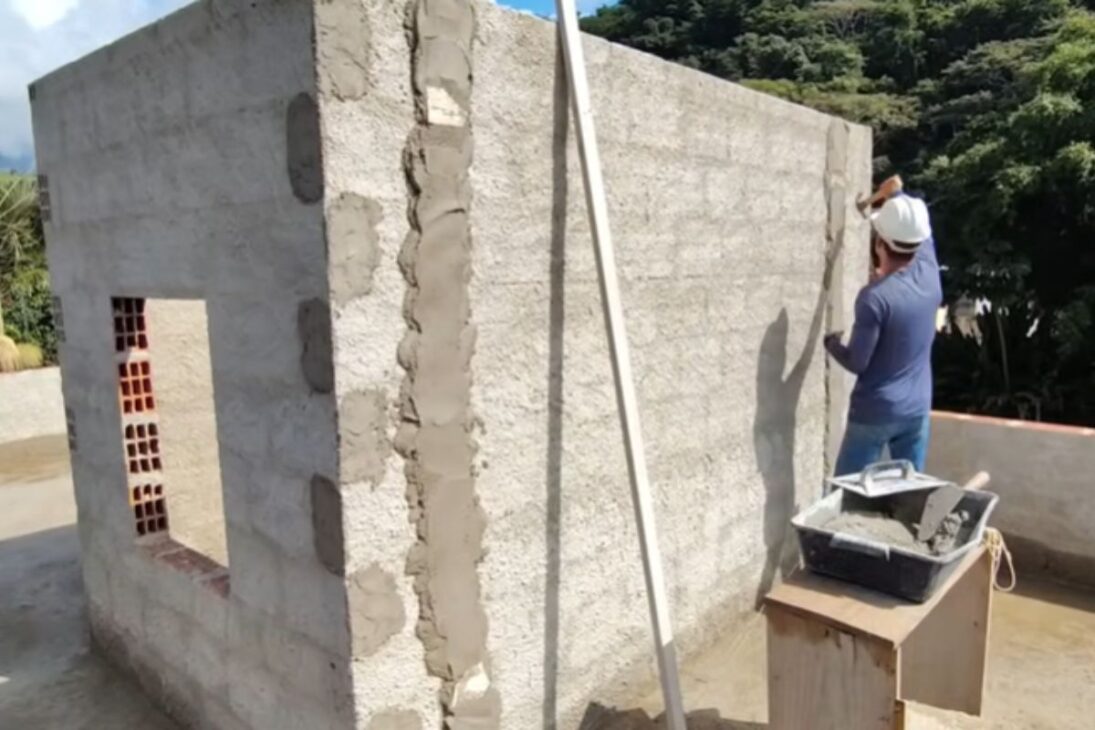
The Mason Jorginho from the JL Construction Channel with Jorginho Shows How to Check the Wall’s Plumb, Create Well-Aligned Guides, Properly Level, and Achieve a Smooth Finish Even for Beginners.
The Mason Jorginho presents a complete step-by-step process for anyone wanting to do quality plasterwork without skipping important steps. Instead of treating the task as something done just with strength and haste, he shows that the result depends on sequence, accurate reading of the wall, and attention to detail from the very start.
In the content, the mason explains how to check the plumb, determine the thickness of the mortar, position nails and lines, install guides, create benchmarks, plaster the wall, level correctly, and finish with a trowel and styrofoam. The logic of the method is simple: when the base is correct, the finish appears much more easily.
The Mason Starts with the Point That Defines the Entire Job
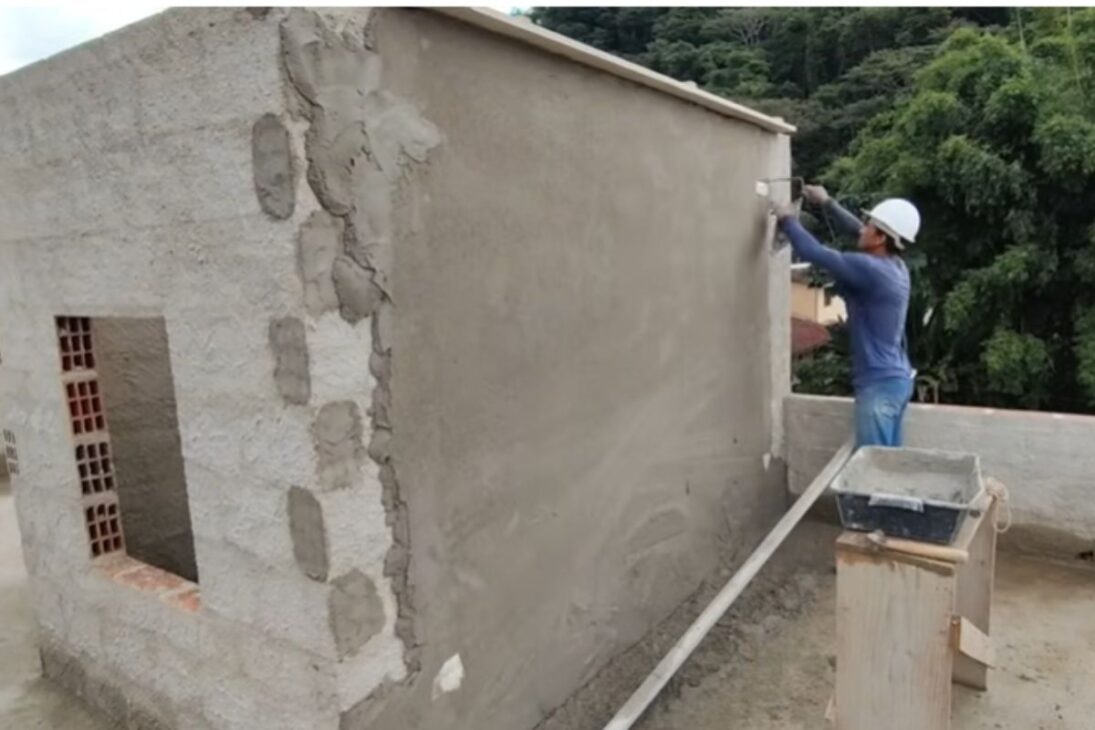
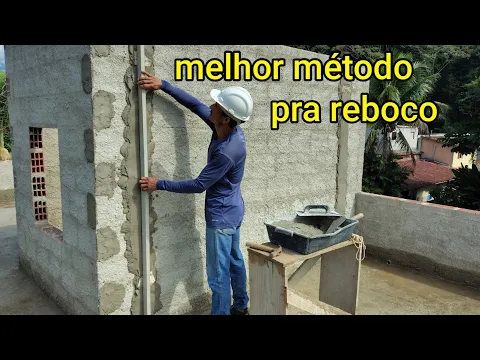
Before thinking about mortar, leveling, or finishing, the mason demonstrates that the first step is to check the wall’s plumb. This step is crucial because it reveals whether the base is already aligned or if it will be necessary to compensate for thickness differences across the surface.
-
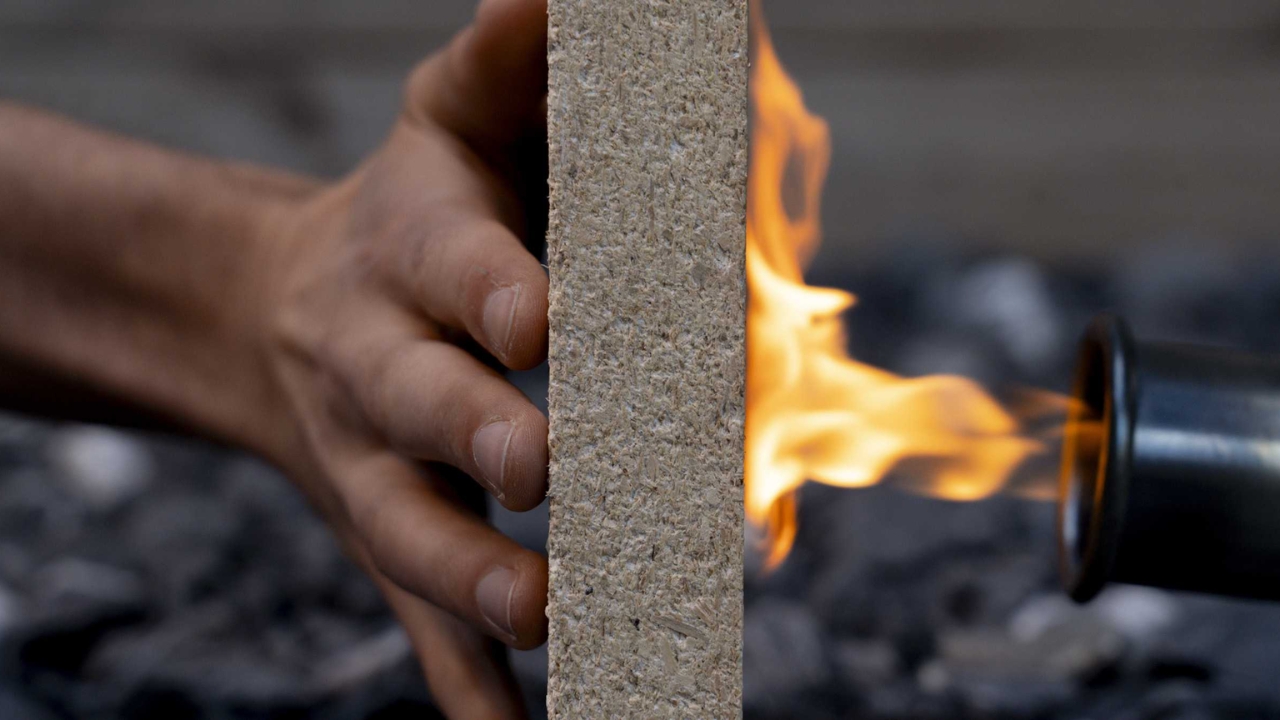
Scientists transform sawdust into fire-resistant panels, stabilize the compound with an enzyme extracted from watermelon seeds, and turn waste into promising material for construction.
-
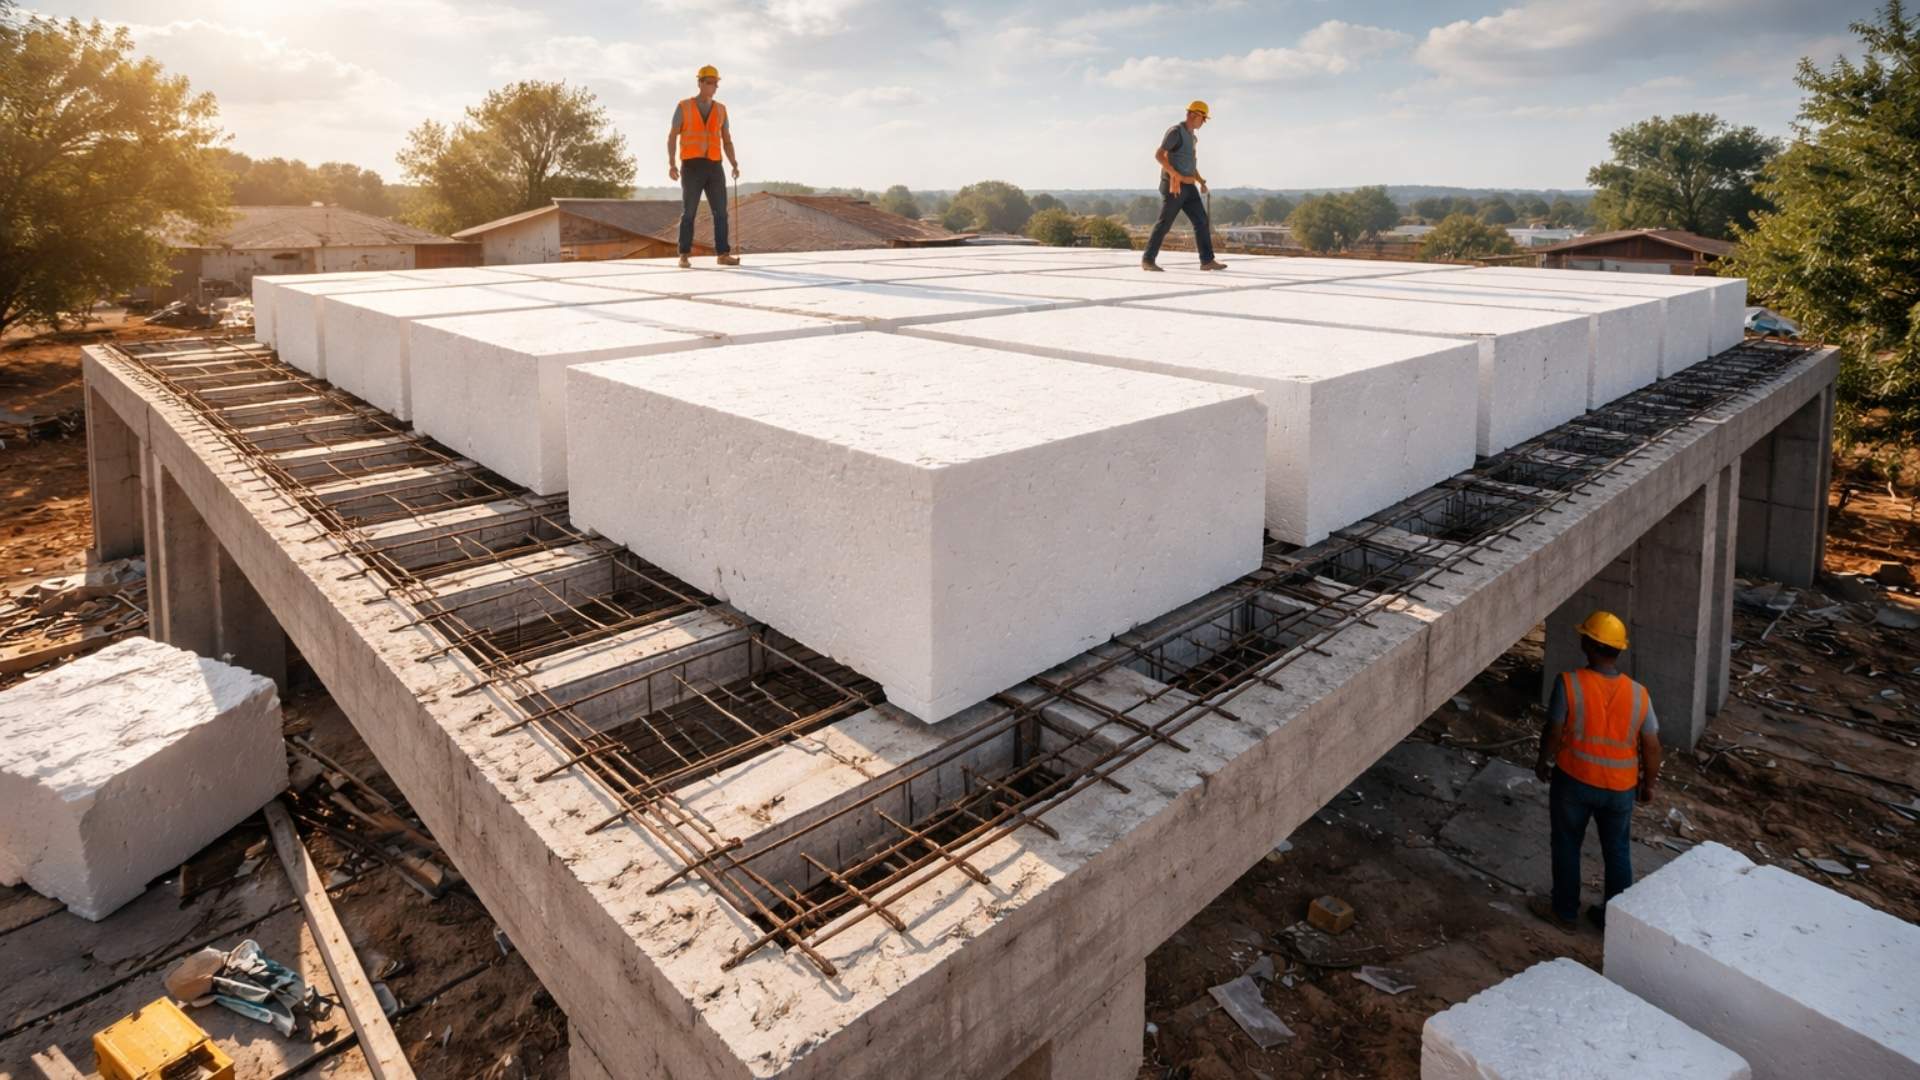
Forget concrete: architects are replacing tons of concrete with giant blocks of expanded polystyrene to build the roofs of houses and reduce structural weight by up to 50%, cut costs, improve thermal insulation, and speed up construction.
-
The Brazilian state enters the center of the global race for critical minerals by starting the construction of the largest underground nickel mine in Latin America, a mineral essential for electric car batteries that the entire world is competing for at this moment.

-
New CCR concrete paving technology promises roads up to 3x more durable, less maintenance, and cost reduction in Brazil.


When the wall is plumb, the work becomes more manageable. According to the explanation provided, there is no need to load too much mortar, and the application can be done with about 1.5 centimeters of mortar. This reduces material consumption and eases execution. A plumb wall allows for a more economical and uniform plaster job.
If the wall is out of plumb, the situation changes. The mason advises observing where it will be necessary to thicken more, whether at the top or the bottom, so that the final plaster does not turn out crooked. This reasoning avoids improvisation and gives the professional or beginner a real sense of what needs to be corrected before applying the mortar.
How to Mark the Wall to Maintain Alignment
After checking the plumb, the mason moves on to marking the wall. The procedure begins with placing four nails, two at the top and two at the bottom, always one at each end of the area that will receive the plaster.
These points serve to stretch the line and create the reference for the job. From there, the desired thickness measurement is transferred to the corners, creating a secure base for the rest of the execution. Without this reference, the plaster may look good up close, but tends to reveal defects when alignment is carefully checked.
This moment is important because it transforms the wall into a surface guided by measurements, not just by visual perception. The mason makes it clear that, in construction, relying solely on the eye often leads to mistakes, especially for those who are still inexperienced.
The Guides Come In to Transform Measurement into Real Guidance
With the line positioned, the mason shows the entry of the guides, which serve as small reference points for creating the benchmarks. They must always be placed along the line, precisely following the alignment already defined.
Furthermore, the positioning between one guide and another must respect the size of the plank that will be used later. This ensures that the tool can work correctly between the points, avoiding sections without adequate support. The guides are not a small detail: they sustain the accuracy of the plaster from the initial phase.
The mason also emphasizes the need to check everything with the plank, observing whether the guides are indeed aligned with each other. This care prevents the benchmark from becoming crooked and compromising the entire wall.
What Are the Benchmarks and Why Do They Control the Plaster
After the guides, the mason enters one of the most important phases of the process, which is forming the benchmarks. The mortar is applied between the reference points and then leveled until straight strips are formed, which will be the basis for the entire wall alignment.
The explanation is straightforward: the benchmarks are the guides that will lead the plank through the rest of the job. If they are correct, the plaster has a great chance of being well executed.
If they are wrong, the rest of the wall will repeat that mistake. In plasterwork, the benchmark acts like a rail: it determines whether the work will proceed straight or not.
The mason also shows that after applying the mortar between the guides, it may be necessary to re-fill some points and run the plank more than once. This happens because the first pass does not always leave the strip completely perfect. The important thing is to keep going until the benchmark is straight, without gaps and flaws.
Why the Mason Recommends Making the Two Benchmarks First
One of the most useful tips for beginners is the advice to first create the two side benchmarks and only then fill in the middle area. The mason explains that this gives more control because, when the mortar for the benchmarks dries a bit, it becomes firmer and better withstands the passing of the plank.
In practice, this prevents the beginner from cutting or sinking their own reference while aligning the center of the wall. Working with the benchmarks already more solid reduces mistakes and provides security when leveling.
This detail greatly helps those who still do not master the timing of the mortar. Instead of trying to plaster everything at once and risking losing alignment, the method divides the wall into more manageable stages, with logical execution and a lower chance of rework.
How to Apply the Mortar in the Safest Way for Beginners
When entering the filling phase of the center of the wall, the mason explains that it is better to throw the mortar at a height sufficient to be slightly above the thickness of the benchmarks. This facilitates cutting with the plank and reduces the emergence of holes later.
He also makes an important choice for beginners: using the trowel to help apply the mortar.
Although there are faster and more aggressive ways to apply, the mason makes it clear that the trowel provides more control for those who are still inexperienced, as it allows working with small portions and distributing the material more safely.
Speed is not the most important thing at this stage. What really matters is to apply the mortar with mastery, without excessive waste and without losing control of the thickness. For those who are learning, this adaptation makes a lot of sense.
The Leveling is Where the Wall Really Takes Shape
After the mortar fills the central area between the benchmarks, the mason begins leveling. This is where the excess is cut off, and the wall starts to gain the straight shape that the plaster needs.
The plank should always work resting on the benchmarks, descending in a controlled manner and removing only what is surplus.
When gaps or sections without sufficient filling appear, the solution is to reapply mortar and repeat the plank pass until the surface is uniform. Well-executed plaster is not just plaster applied once, but plaster corrected until true alignment is achieved.
This is a point where Jorginho’s method strengthens, as he insists on showing that perfection does not come from a single movement. The smooth and well-aligned result arises from the correct repetition, correction of gaps, and the patience to follow the reference of the benchmarks.
Only Then the Mason Closes the Sides
When the central part is already leveled, the mason then moves to the outer sides. This order helps the beginner because, with the middle already ready, the plank can support itself on a leveled area and work on the sides more easily.
At this point, the guides that no longer serve a purpose can be removed for reuse on another wall.
The process follows the same logic: apply, cut with the plank, and verify if everything continues to align with the already completed central area. By dividing the job into center and sides, the plaster becomes much easier to control.
This strategy is particularly useful for those who still lack confidence in plastering large continuous areas. Instead of facing the entire wall as a single block, the method organizes the execution into sectors that complement each other.
How to Check if the Plaster is Well-Aligned
After leveling, the mason teaches a simple and efficient method for checking. The plank should be leaned against the wall in different positions: horizontally, vertically, and also diagonally, forming an X.
If the plank rests well from one end to the other, without leaving significant gaps, this indicates that the plaster is aligned. This check serves both for those who executed the work and for anyone who wants to evaluate if a job was well done.
A good wall withstands the check; a bad wall reveals defects at the first test with the plank.
This type of check is valuable because it prevents small flaws from going unnoticed before the final finish. When the error is identified early, it can still be corrected easily.
The Trowel is Used to Refine the Surface
With the wall already straight, the mason moves to the leveling stage. In this phase, the brush moistens the surface, and the trowel runs over the plaster to reduce marks, regulate the feel, and leave the wall more uniform.
He also highlights the importance of using a well-straight and good-condition trowel, as a poor tool directly interferes with the result. In finishing, a crooked tool compromises a job that has been well executed until then.
Another care remembered is the use of protective gloves. Although this observation appears more at the end of the explanation, it is important because the mortar damages the skin, and the work requires constant contact with wet and abrasive material.
The Finish with Styrofoam is the Mason’s Preference
In the final phase, the mason shows his preference for using a piece of styrofoam instead of a sponge. He cuts the material, improvises a support for the hand, and uses this piece to do the final finish on the wall.
According to the demonstration, styrofoam leaves the surface even smoother, softening the small marks that remained after leveling.
The difference between the already finished area and the one that has not yet undergone this step is quite noticeable. This is the moment when the plaster stops merely looking correct and starts to display a truly refined finish.
This kind of choice also reveals Jorginho’s practical experience from JL Construction with Jorginho, as it shows not only the basic method but also the preference of someone who has executed many walls and seeks a cleaner final touch.
The Mortar Mix Also Helps Define the Quality of the Plaster
Beyond execution, the mason shares the mix used for external plasterwork. The presented mixture requires five buckets of sand, consisting of two buckets of medium sifted sand and three buckets of fine sifted sand, for one bucket of cement and one bucket of lime for the mix.
This mix, according to the explanation, provides good bonding and facilitates the workability of the material. The balance between sand, cement, and lime affects both application and finishing, as poorly dosed mortar can hinder cutting with the plank, leveling, and finishing with styrofoam.
It is not enough to know how to apply mortar: one must work with a mix that responds well during each stage.
What the Mason Teaches in the End
The content makes it clear that achieving perfect plaster does not depend on hidden tricks, but rather on method. The mason Jorginho organizes the work in a logical sequence, starting with the plumb, moving on to marking, guides, benchmarks, filling, leveling, checking, and finishing.
For beginners, the biggest lesson is understanding that each phase prepares the next. When one step is well executed, the following one becomes easier.
When a step is skipped or rushed, the error will show in the final result. This reasoning makes the step-by-step process especially useful for beginners who want to learn without turning the wall into trial and error.
In your opinion, which step of the plaster requires the most attention from those who are starting: checking the plumb, making the benchmarks, or getting the final finish right?


-

-

-

8 pessoas reagiram a isso.