Portuguese
  Spanish
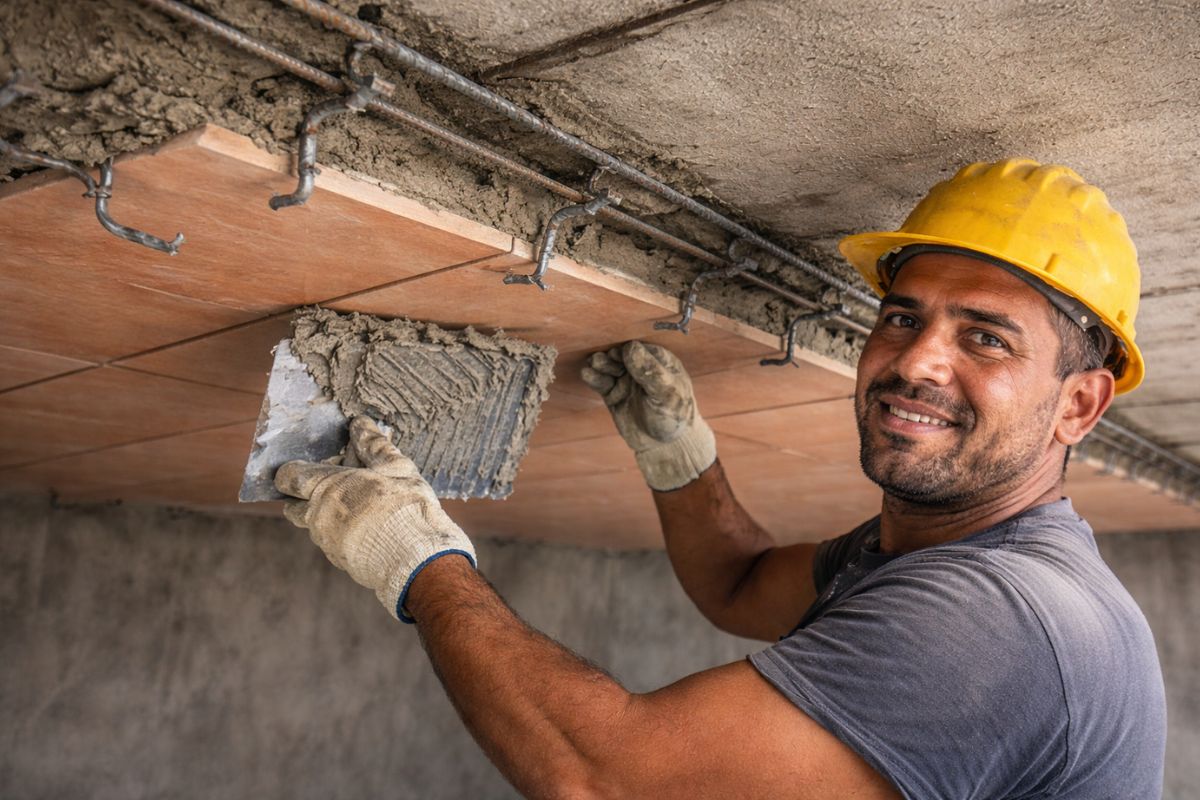
With A Small Slab, Clip And Wedge-Bound Finishing, Five Points With Plastic Mass, Angle Brackets And 10 mm Rebar, The Ceramic On The Ceiling Gains Real Adherence When It Receives Mortar With Additive, Anchoring Grooves, Pop Mesh And Careful Pouring Before The Final Cure To Resist Continuous Moisture.
The ceramic on the ceiling often divides opinions because many people look at the finished finish, find it beautiful, but distrust its durability. The step-by-step shown by the mason Oséias tries to address this fear by revealing that the problem is not in the coating itself, but in the incorrect way it is fixed, anchored, and protected against expansion, steam, and displacement.
In the method presented, the promise does not arise from improvisation. It depends on a technical sequence that combines correct wall cutting, firm shoring, well-positioned clip and wedge, 10 mm rebar, mortar with additive, adhesion grooves, pop mesh, well-vibrated pouring, and protected curing. It is this sum of details that separates a durable ceramic on the ceiling from a finish doomed to loosen over time.
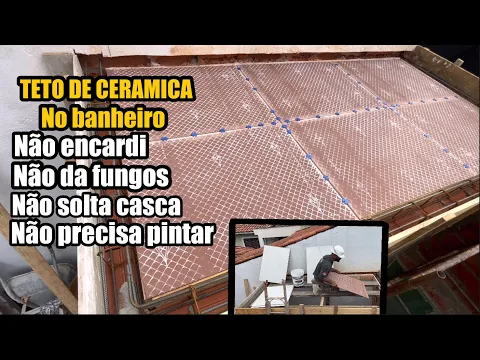
The Base Of The Ceramic On The Ceiling Starts Before The Finishing

The first important point is that the work was carried out on a small slab in a space used for storing objects, although the mason himself says that the procedure is the same as for a small bathroom.
-
Detroit Microhouse Village Offers Former Homeless Residents Ownership After 7 Years: First 3 Tenants Receive Deeds

-
Brazilian Factory in Ivoti Produces 500 Modular Steel and Fiberglass Concrete Homes Following 2024 Floods, Securing $13 Million Contract
-
Brazilian Startup Develops Recycled Plastic Bricks, Cutting Construction Costs by 40% and Speeding Up Building by 90%

-
Tarcísio Opens New São Paulo Metro Line After 18-Year Wait, Offering Free Rides at 6 Stations and Aiming to Cut Commute to 23 Minutes for 633,000 Daily Passengers


Before any ceramic piece came into play, a small cut was made in the wall to embed the slab. Then came the closing timber, which needed to be very well secured to prevent concrete leakage.
At this stage, care with shoring does not appear as a detail, but as the basis of everything. The inner boards were left lower than the outer ones precisely to limit the concrete, and the use of screws was prioritized because it facilitates demolding later.
The logic is simple: if the temporary structure comes out crooked, loose, or poorly shored, the ceramic on the ceiling is already born resting on a compromised stage.
After that, the preparation of the base that would support the weight of the small slab began. The wooden material that was already on-site was used for being resistant, even when lying down.
Only then did the finishing begin to be applied from below, with large slabs and a centrally positioned expansion joint on the slab. The comparison made by the mason is direct: the installation resembles that of the floor, with clip and wedge, but with an important difference in position.
On the floor, the wedge is usually secured in a more intuitive way. On the ceiling, it was secured from beneath.
The reason is practical: if the wedges were placed upwards, later on, removing the clip base would be done by cutting from below, risking damaging the edge of the finishing.
This is the type of small mistake that many construction sites make and later appears as chipping, gaps, and misalignment.
The Secret Of The Anchoring Lies In The Rebar And The Right Adhesive

The second decisive stage is anchoring. The 10 mm rebar had its ends bent and were embedded in the side and in the wall, functioning both in the concrete structure and in the support of the finishing.
To reinforce the anchoring points due to expansion, the mason used plastic mass, small metal angle brackets in L shape, and strapping tape.
According to him, five cans of plastic mass and two angle brackets were used at each point.
This reinforcement answers a classic question for those who see ceramic on the ceiling: “Isn’t this going to fall later?”
The method shown attempts to neutralize this risk precisely because it does not rely solely on superficial adherence. It creates points of mechanical support and tying even before pouring the concrete.
In other words, the piece does not depend on a single layer of adherence.
But the biggest secret pointed out by the mason comes right after. He claims that if the concrete is poured directly over the finishing, the system does not work as it should, because the concrete does not properly adhere to the ceramic surface.
The solution was to first apply a good mortar, already prepared with grooves made with a trowel, to create anchoring points capable of receiving the concrete on top.
This reasoning becomes even stronger with the additive. The product used, called Smart Aditivo, was added to the mortar to enhance the bond, even being a weak mortar. On top of this layer, the pop mesh was placed, tied to the rebar with tape.
Before that, the conduit and the centralized box for lighting were also installed.
The ceramic on the ceiling, here, is not glued on trust. It is secured, anchored, and tied in layers.
Pouring, Drizzle and Curing Make A Difference In The Result
With everything prepared, the pouring took place. The work happened under a drizzle, which makes the process slower and more tiring, although the mason makes an important distinction: filling a slab in drizzle is different from working under heavy rain.
The drizzle does not destroy the concrete in the same way. Heavy rain can wash out the material and carry away the cement, which is the most valuable element of the mix.
The mix used was reported accurately: three buckets of coarse sand, three buckets of gravel 1, one bucket of gravel zero, and one bucket of CP2 cement.
During the pouring, the beams were vibrated with a battery-powered vibrator. This stage is technical and decisive because the concrete needs to settle homogeneously and fill the spaces correctly without leaving internal voids.
In a small slab, many people tend to relax, as if the smaller size forgives mistakes. The video goes in the opposite direction.
Even small, pouring requires method, and the ceramic on the ceiling depends on this consistency. If the concrete is poorly compacted or is harmed by rainwater, the final structure loses quality and transfers this problem to the finish.
The next day, a generous coat of Smart Resina was applied as a curing membrane.
This point also matters because curing protects the concrete at a time when many construction sites simply abandon the surface and move on to the next phase.
Here, the logic was different: respect the curing time of the slab before entering with the final finishing.
Haste is one of the biggest enemies of ceramic on the ceiling when real durability is desired.
What Prevents Mold, Displacement, And Darkening Over Time
One of the central arguments of the method is that ceramic on the ceiling does not create mold, does not darken like other surfaces, and is very easy to clean, especially in humid environments like bathrooms.
The practical explanation given by the mason is that the material does not absorb water in the same way as other finishes. It receives steam and condensation, dries, and returns to normal as long as the execution was done correctly.
However, there is an important caveat about expansion and sun exposure.
The mason himself answers the question by saying that, to reduce or eliminate the effect of excessive heat, it is necessary to either create a covering above or waterproof with a white product that reflects solar radiation. This reduces thermal impact on the slab and better protects the system.
In other words, ceramic on the ceiling works better when extreme heat is also treated as part of the project.
Another practical detail is in the lighting box.
Instead of keeping a large opening, only a hole was left to drop the wiring, since the point would receive an LED rod. This avoids unnecessary cuts and better preserves the set.
Once again, the method presented shows a constant concern for integrity, locking, and reducing fragility.
In the end, the technical message is quite direct: the most common mistake is not using ceramic on the ceiling, but trying to reproduce the same simplified logic of a standard wall finish on the ceiling, without mechanical reinforcement, without prepared mortar for adherence, without grooves, without mesh, and without considering expansion.
This is where the construction begins to lose its future right on the day of execution.
The step-by-step presented shows that ceramic on the ceiling can cease to be a controversial finish when it receives proper structure, anchoring, and curing.
10 mm rebar with bent ends, plastic mass, angle brackets, mortar with additive, grooves, pop mesh, well-vibrated pouring, and protection against expansion together form a set that tries to resolve exactly the points where many people usually make mistakes.
In the end, there are no magic tricks. There is method. And it is this method that supports the promise of a ceiling that does not mold, does not produce fungi, does not darken, and does not loosen over time. If you were to install ceramic on the ceiling in your work, what generates the most distrust for you today: the anchoring, the expansion, the concrete curing, or the fear of seeing the finishing loosen years later?