Portuguese
  Spanish
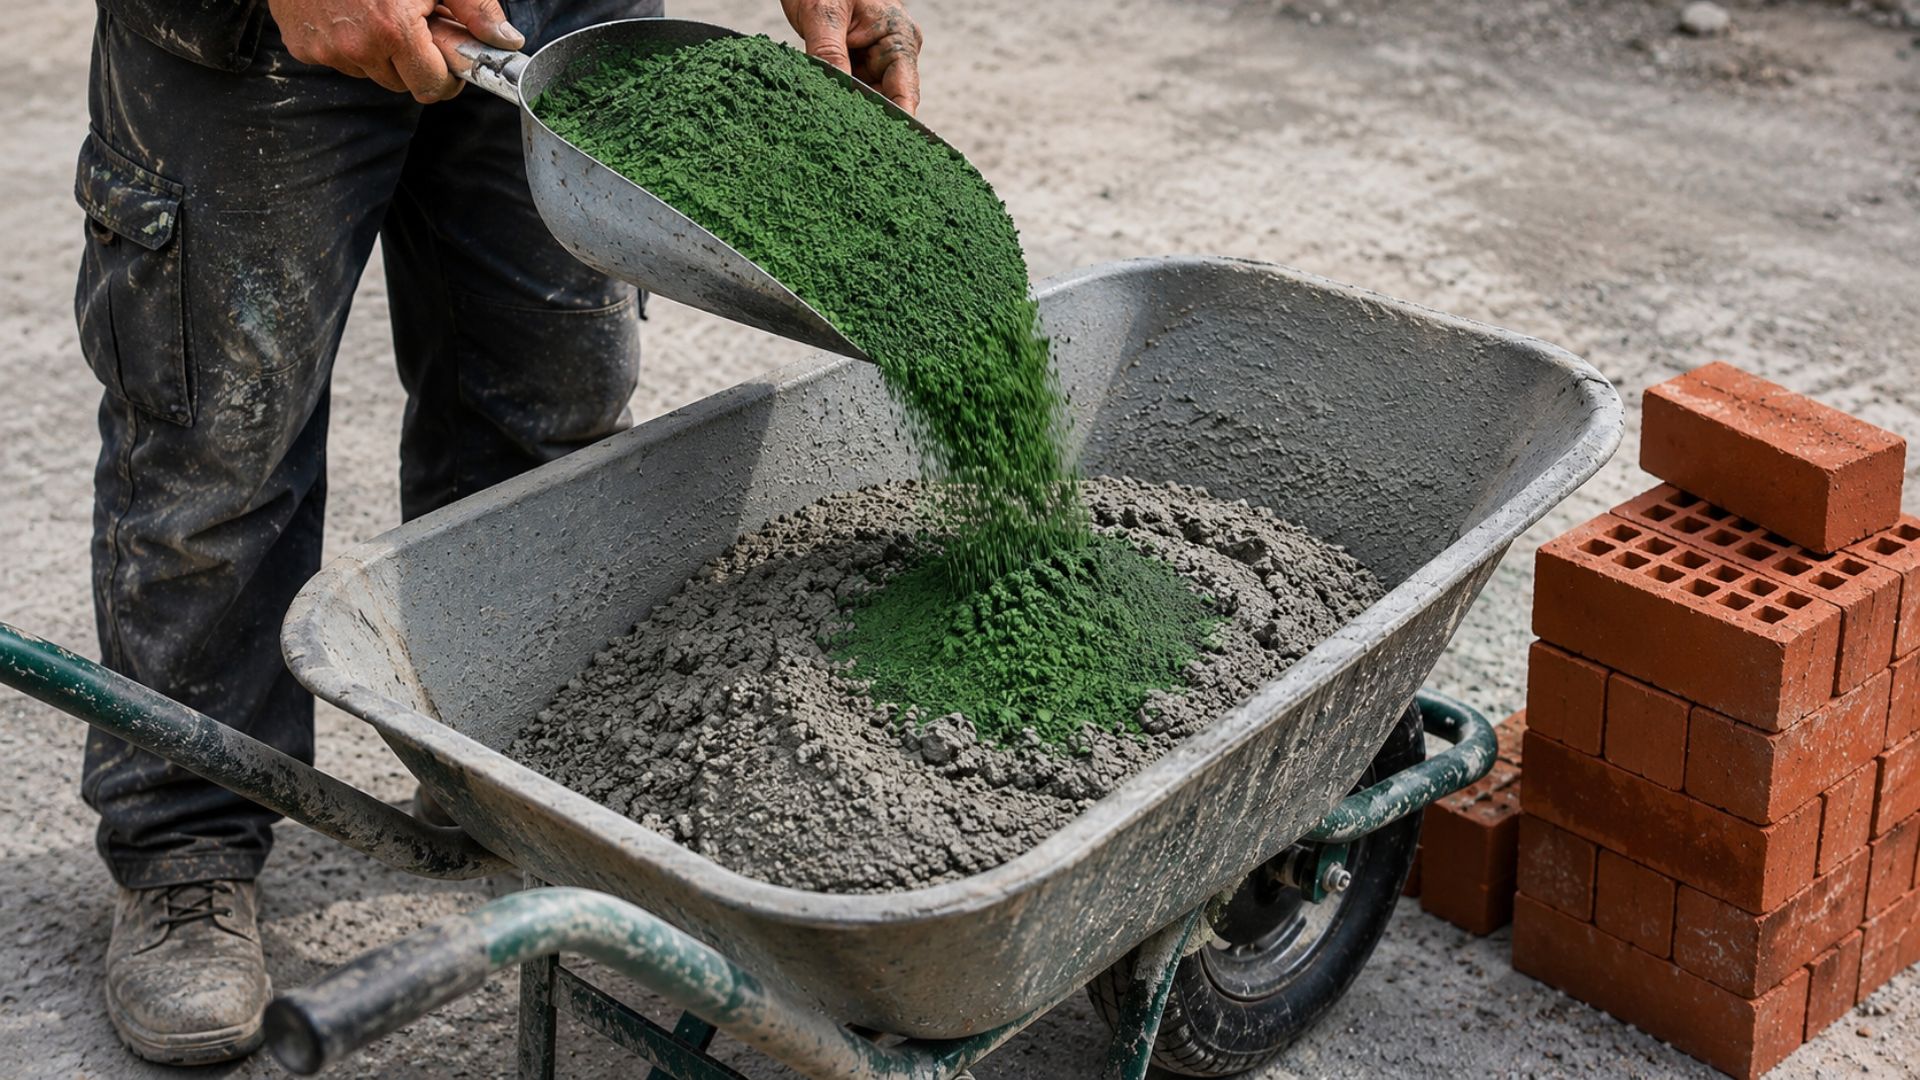
A homemade technique for thick floor renovation is spreading across social networks and gaining the attention of those who want to improve the appearance of their home without investing in ceramics. The method uses three cheap materials: AC3 mortar, pigmented burnt cement, and white wood glue. The result is a smooth and colorful finish that covers the old floor, facilitates cleaning, and serves as a temporary solution until the resident gathers resources for a definitive renovation.
The homemade technique that is going viral on social networks among builders and renovation enthusiasts solves a problem that millions of Brazilians face: the old, pitted, and hard-to-clean thick floor that no one can afford to replace with ceramics. The method consists of applying a layer of AC3 mortar over the existing floor, waiting four hours for it to dry, and then covering it with a mixture of burnt cement, water, and white wood glue. The final finish is pulled with a squeegee, creating a uniform surface that can be pigmented with chess dye in the desired color.
The homemade technique works on sidewalks, garages, bathrooms, kitchens, and any area with a thick floor that needs visual renewal. The cost of materials is a fraction of what would be spent on ceramics: a bag of AC3 mortar, a few kilos of cement, white glue, and pigment total less than R$ 100 in materials to cover several square meters. For those saving money for a larger renovation, the method works as a stopgap that improves the appearance and functionality of the floor without compromising the budget.
The materials required by the homemade technique
The list of materials is short and accessible. The first item is AC3 mortar, which is the strongest bonding adhesive available on the market, designed for outdoor areas and floors subject to temperature variation. The use of AC3 is mandatory because it ensures adhesion between the old thick floor and the layer of burnt cement that will be applied on top. Weaker mortars, such as AC1 or AC2, do not offer the same fixation and may come loose over time.
-
Giant Robots Build Entire Neighborhood of 100 3D-Printed Homes in the U.S., Showcasing Technology’s Impact on Construction Industry

-
Helsinki Residents Receive Water That Travels 120 Kilometers Through a Hidden Rock Tunnel from a Lake Before Treatment

-
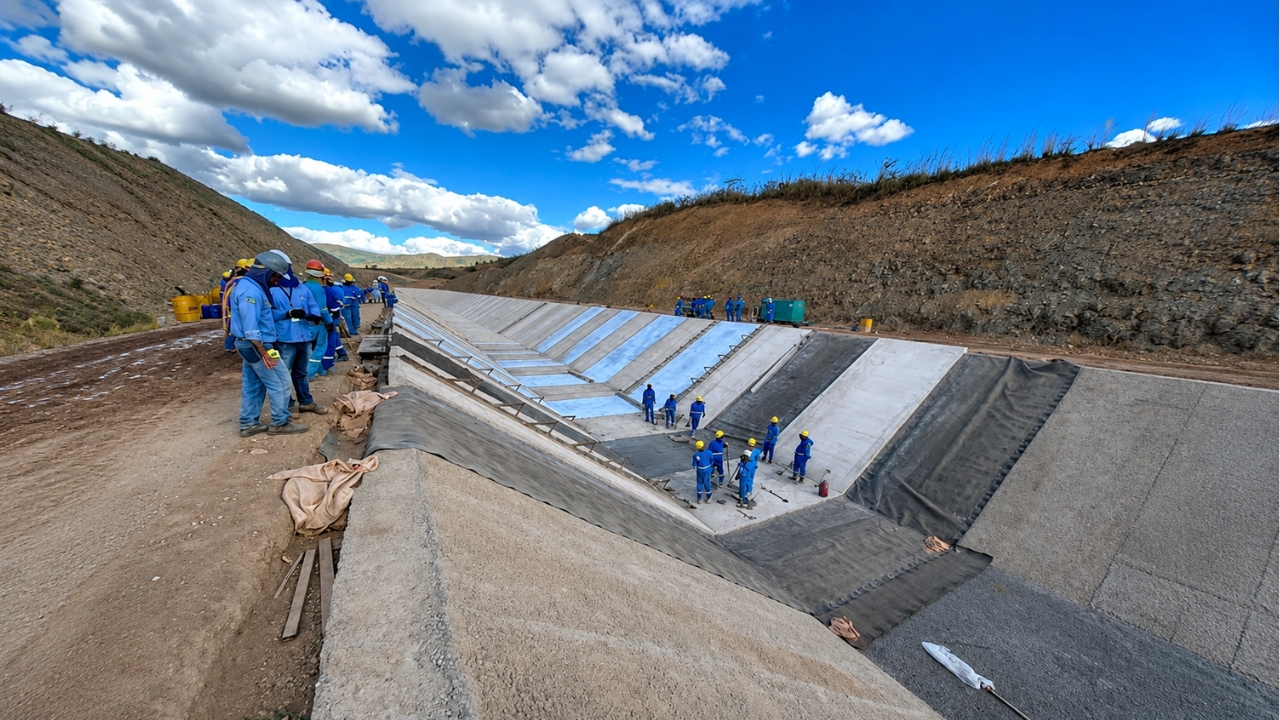
Brazil’s Sertão Region Nears Completion of Latin America’s Longest Artificial River, Transforming Water Access in Drought-Prone Ceará
-
Pre-mixed stabilized mortar set to revolutionize construction in 2026: extends usability to 36 or 72 hours, boosts productivity, and minimizes waste in building projects.


The second material is common cement, used to prepare the polished cement. The proportion indicated by the builders who popularized the homemade technique is 2 kilos of cement to 1 liter of water. The third item is white wood glue, added to the mixture in the proportion of 80 to 100 milliliters for every 2 kilos of cement. The glue increases the flexibility and adhesion of the final layer. The chess pigment is optional but allows coloring the finish in the desired shade.
The step-by-step that the builders teach
The homemade technique follows a sequence of steps that cannot be altered. The first step is to wash the rough floor with water, removing dust, grease, and any residue that might compromise the adhesion of the mortar. After complete drying, the floor is wetted again immediately before applying the AC3 mortar.
The mortar is applied with a trowel in a thin layer, approximately 3 millimeters. After application, the resident must wait four hours for drying before applying the polished cement. The wait is important because the mortar needs time to create adhesion, but it cannot dry from one day to the next, as it would lose the ability to receive the top layer. The polished cement is poured over the mortar and spread with a squeegee in uniform movements.
Why AC3 mortar is irreplaceable

The builders who popularized the homemade technique are emphatic on this point: there is no point in using lower category mortar. AC3 was developed to withstand thermal variations, humidity, and mechanical stress, characteristics that make it the only viable option for fixing a layer of polished cement over an old rough floor.
Many comments on social media report that they tried to reproduce the homemade technique with AC1 or AC2 mortar and that the finish came off in weeks. The difference lies in the composition: AC3 contains additives that increase adhesion resistance and flexibility of the mixture, allowing it to hold even under foot traffic and temperature variations. Saving on mortar means losing the investment in cement, glue, and labor.
The finish and the limitations that no one hides
The builders themselves who teach the homemade technique make a point of warning: the result will not be perfectly smooth like ceramic. The polished cement applied with a squeegee produces a functional and visually superior surface to the rough floor, but it presents small irregularities natural to a manual and homemade work.
The technique works as a temporary solution for those who cannot invest in ceramic immediately. The renewed floor is easier to clean, eliminates the dust that the rough floor releases, and significantly improves the appearance of the environment. However, it does not replace a definitive renovation with ceramic, porcelain, or leveled subfloor. If the original floor is too damaged, with deep holes or large unevenness, the recommendation is to make a new subfloor before applying the technique.
Have you ever tried to renew a rough floor with polished cement or know someone who used this homemade technique? Did it work or come off? Share your experience in the comments.