
 Portuguese
  Spanish
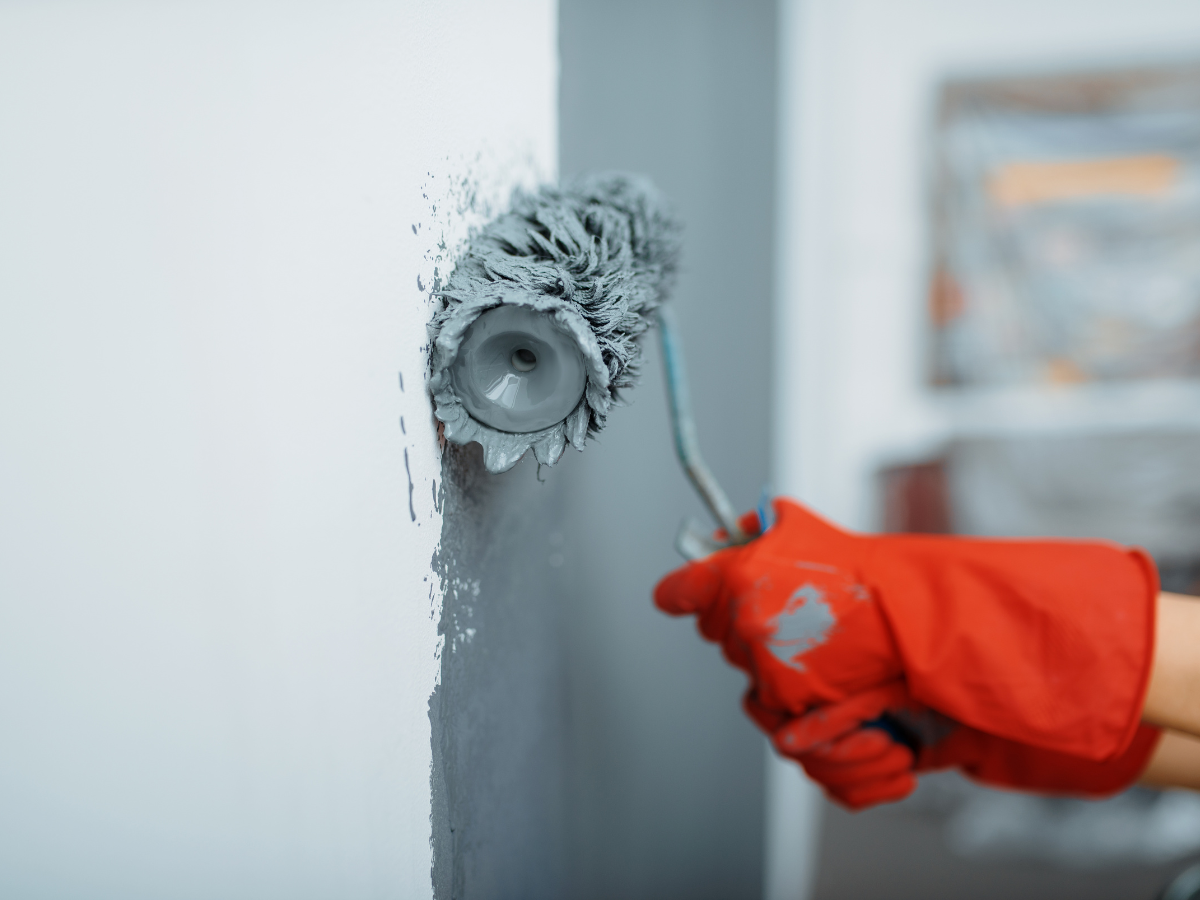
Are You Still Painting Walls With Regular Paint? Discover Why Rubberized Paint Is Much More Advantageous.
Increasingly used in residential and commercial projects, rubberized paint stands out in the market for its durability, elasticity, and protection against the elements. Follow everything you need to know about this innovative coating, how to apply it correctly, and ensure a long-lasting finish.
What Is Rubberized Paint and Why Has It Become a Trend?
With technological advancements in the construction and renovation sector, more efficient and versatile products are emerging to make consumers’ daily lives easier.
It is in this scenario that rubberized paint consolidates itself as one of the main bets for those seeking durable and functional exterior painting.
-
Rio de Janeiro receives more than R$ 5.5 billion in sanitation, includes almost 1 million residents from communities in the formal customer base, and brings water, sewage, and proof of residence to regions historically neglected by urban infrastructure.

-
Via Mar promises to relieve BR-101 in Santa Catarina, but it will be the state’s first toll state highway and faces soft soil and rice fields that threaten the timeline.

-
To halt the advance of the Sahara, the 8,000 km Great Green Wall in the Sahel relies on reforestation to combat desertification, but by 2026 it remains far behind the goal of 100 million hectares.
-
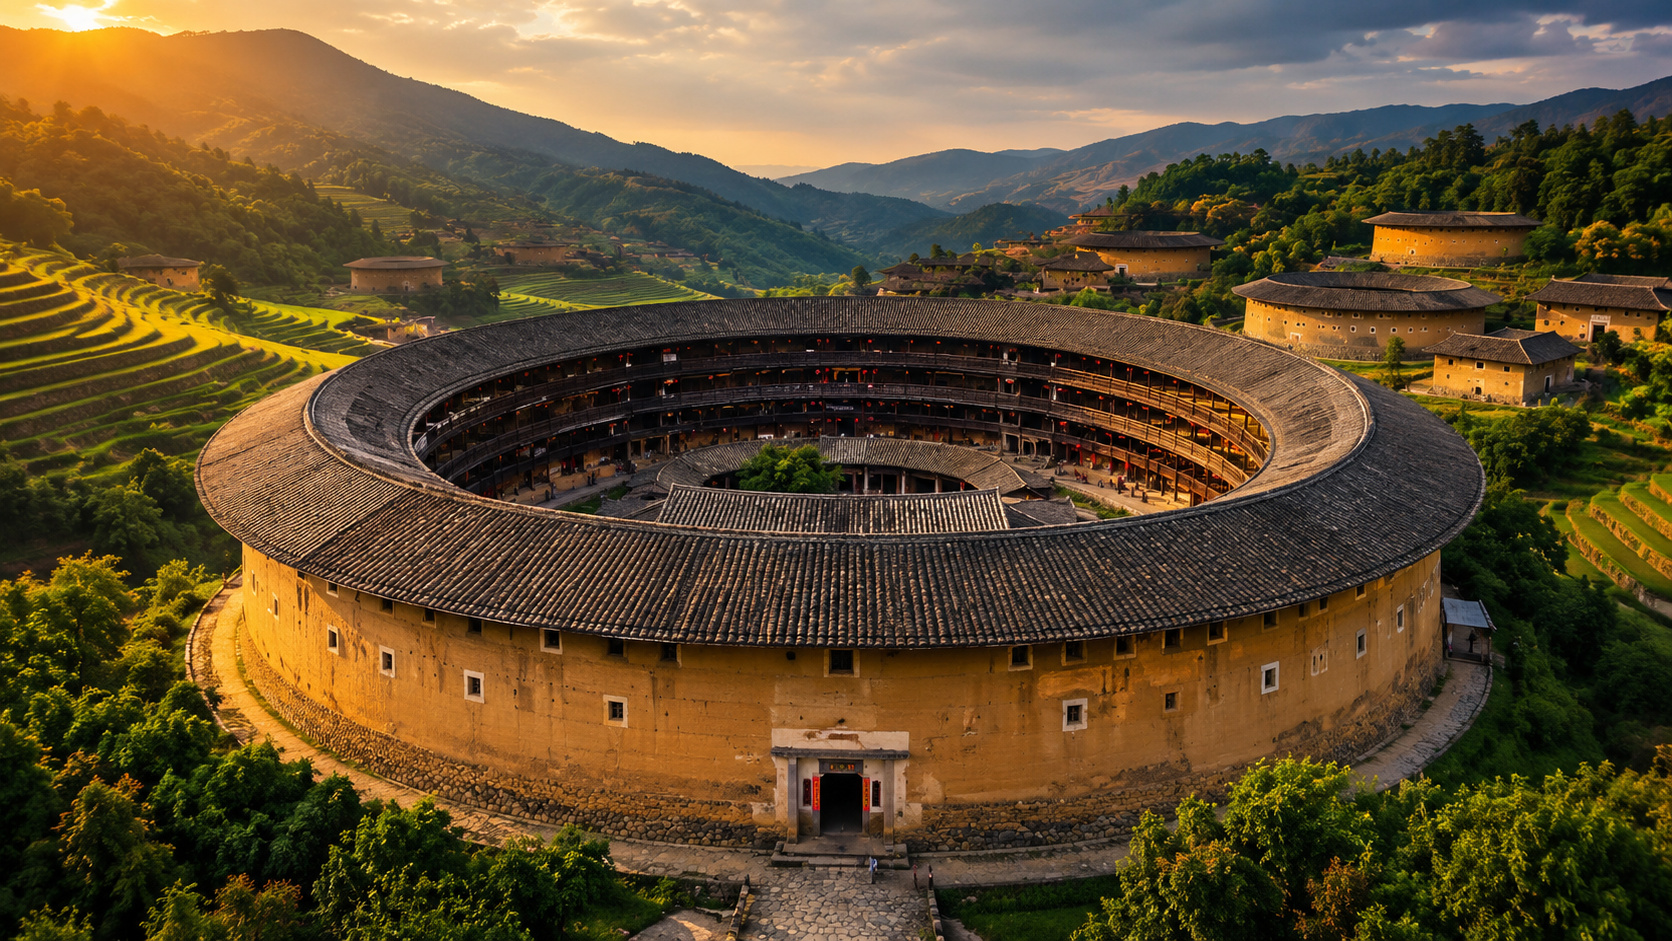
Long before sustainable construction became a trend, China built earthen fortresses with multiple floors, a central courtyard, and the capacity to house up to 800 people living in a community.


Its innovative formula includes elastomeric resin, a component that gives the paint unique flexibility.
This allows the paint to adapt to the natural variations of surfaces, such as expansions caused by heat or humidity, without showing cracks or peeling.
In addition to high resistance, rubberized paint also offers quality aesthetic finish, making it ideal for facades, walls, bathrooms, laundries, and other areas that require greater protection against the effects of time.
Benefits That Go Beyond Appearance
Unlike other conventional paints, rubberized paint offers a range of benefits that go far beyond visual appeal. Among the main positive points are:
- High Durability: Forms a resistant protective film that guarantees a long life for the paint;
- Waterproofing: Protects against infiltration and moisture, a decisive factor for facades and walls exposed to rain;
- Elasticity: Prevents cracks and fissures by following the movements of the surface;
- Thermal and Acoustic Insulation: In some formulations, it contributes to thermal comfort and noise reduction;
- Ease of Maintenance: Reduces the need for frequent touch-ups.
These attributes make rubberized paint an excellent alternative for those who want to combine beauty, resistance, and long-term savings in a single product.
Where to Use Rubberized Paint?
Although it is widely recommended for outdoor environments, where exposure to sun, rain, and climate changes is intense, rubberized paint can also be used in indoor areas with high humidity, such as:
- Laundries;
- Bathrooms;
- Kitchens;
- Basements or areas susceptible to mold and infiltration.
Its use on vertical surfaces is most indicated, making it a smart choice for both new constructions and renovations that seek to reinforce wall protection.
How to Apply Rubberized Paint: Essential Step-by-Step Guide
To ensure all the benefits of rubberized paint, proper application is essential. See below a practical guide with all the steps:
1. Gather the Necessary Materials
Have on hand:
- Rubberized paint;
- Roller and brush for painting;
- Paint tray;
- Masking tape for protecting unpainted areas;
- Drop cloth or plastic to cover the floor;
- Ladder, if necessary.
2. Prepare the Surface
The wall must be clean, dry, and free of dust, grease, or mold residues. Cracks should be repaired beforehand with appropriate filler. This step is essential to ensure the adhesion and durability of the paint.
3. Shake the Product Well
Before applying, mix the rubberized paint well, ensuring the uniformity of its components and facilitating application.
4. Apply in Sections
Divide the area into segments and work in parts. Use the brush for corners and finishes, and the roller for larger areas. Make crossed movements in “W” or “M” shapes for better paint distribution.
5. Respect the Drying Time
Wait for the complete drying of the first coat according to the manufacturer’s instructions. Then, apply the second layer if necessary.
6. Finish With Care
After painting, carefully remove the tape and check if touch-ups are needed. If everything is uniform, your project will be ready and protected.
Extra Tips for a Flawless Finish
- Avoid extreme temperatures during application: very cold or very hot weather can compromise drying and adhesion.
- Ventilate the environment: even in indoor areas, it is essential to maintain air circulation to speed up drying and dissipate odors.
- Use protective gear: gloves, safety glasses, and suitable clothing ensure safety against splashes.
Rubberized Paint Is a Synonym for Smart Investment
If you are renovating or building and want a painting solution that goes beyond aesthetics, rubberized paint is the ideal choice.
Its flexibility, resistance, and waterproofing ability place it among the most comprehensive options on the market.
Moreover, by minimizing the need for constant repainting, it represents long-term savings. It is worth remembering that, for an efficient result, it is essential to follow the instructions for application and maintenance correctly.


-

-

2 people reacted to this.